Please note:
To unlock this capability, you will need to have added Web Push Notifications to your Optimove package. If you can’t see this feature in your Optimove instance, contact your CSM to learn more.
What is a Web Push Prompt?
Web push notification prompts are the notifications that pop up on your user’s web browser (either on mobile or desktop), which enable them to opt-in to receive web push notifications from your website. These appear below the search bar on their web browser and ask visitors to confirm if they would like to receive web push notifications from your website.
Types of Web Push Prompts
There are 2 types of web push notification prompts that should be implemented in order to maximize the number of subscribers you achieve for your web push notification channel.
- Soft Push Prompts
- Hard Push Prompts
Soft Push Prompt
Soft prompts are used to prime your users, and make sure they realize the value of subscribing to your web push notifications. These prompts do not subscribe the user to web push but could be used to allow users to select categories of things they are interested in being notified about. They are shown before or alongside the hard, native prompt from the browser.
Hard Push Prompt
Hard prompts are the Native Permission prompts that are shown by your visitor’s browser, which will enable them to allow or deny web push notifications. This can only be shown to a visitor once, and will not be shown again, so you need to make sure that your soft push prompt clearly conveys the benefits of allowing notifications.
How to Manage Web Push Prompts
To configure when and where to prompt website visitors to subscribe to web push notifications, head to Settings, then under Mobile, click on the Web Push Prompts option.
From this tab, you will be able to add rules controlling where you want web push prompts to be shown on the site and add specific actions. This can be used in order to add subscribers to a channel according to the location on the site. Click "Add" to create a rule.
You can add multiple prompts with different labels and appearances on different pages.
Configuring Your Web Push Prompts
Prompt Type
When you create a new Web Push Prompt there are 3 prompt types to choose from and a preview area that shows what these will look like as you customize them.
You can select a bell prompt:
An alert appears at the top of the page:
Or a banner at the top of the page:
You can add multiple push prompts, however, you can only configure one at a time. Press "Next" in order to continue customizing.
Appearance
You can customize the text that will be displayed for alerts and banners or what will be shown when the user hovers over the bell prompt.
The options for customizing labels will vary based on the prompt type selected in the previous screen as a bell prompt has less text to customize.
Expand "Appearance" to customize the layout and color scheme for your prompt.
For bell prompts, you can position the prompt in the bottom left or right-hand corner and change the background and foreground colors. As you do this, you can see a preview of how the prompt will look.
For alerts and banners, you can customize the colors for every element of the prompt, there is also an option to mask the website until the user has accepted or declined the prompt which can be toggled if desired.
Click "Next" to continue customizing the prompt.
Overlay
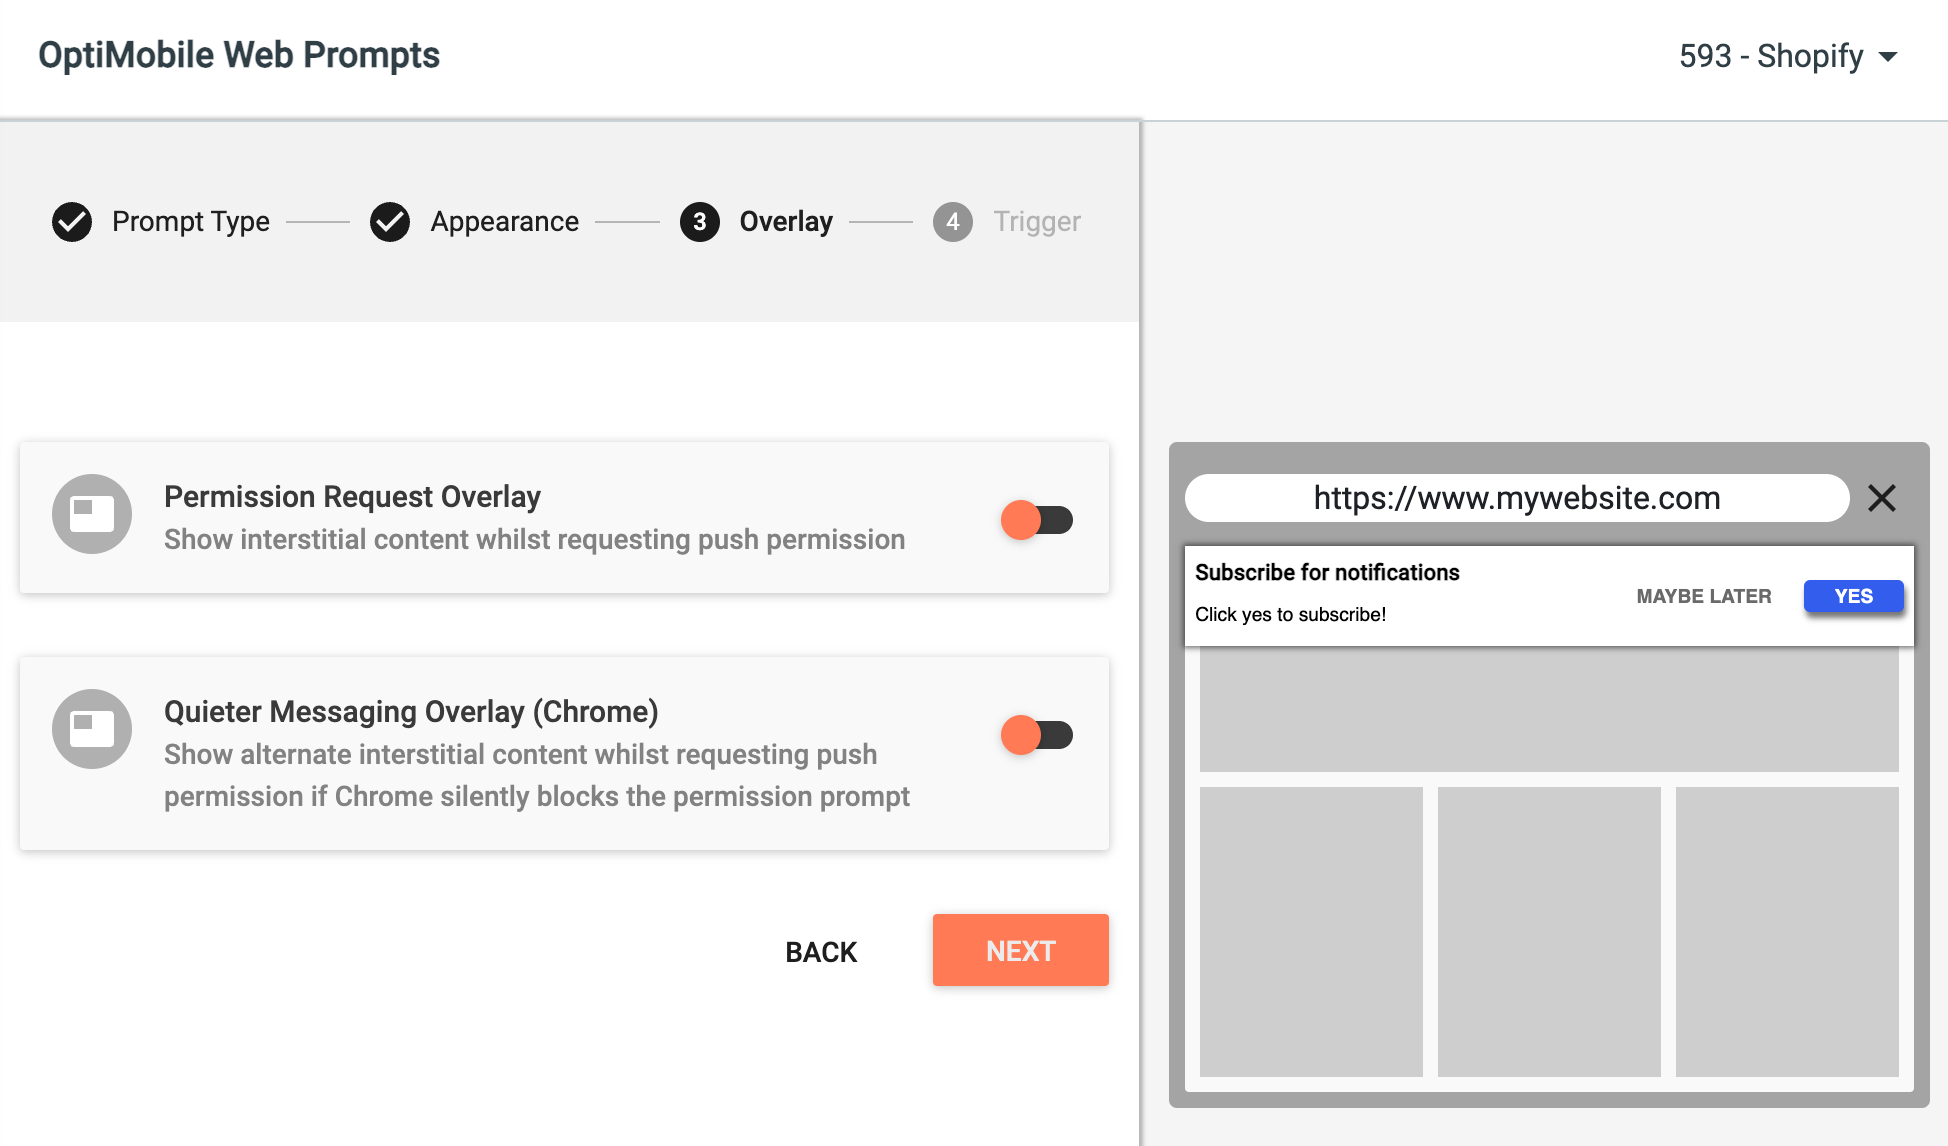
To boost subscription rates, you can show some interstitial content (like an advert, or promotion that highlights the benefit of subscribing to push notifications) while the browser is loading the prompt. Toggle "Permission Request Overlay" and enter a Heading and Body for the overlay.
In Chrome, where Quieter Messaging can block customers from receiving prompts, you can choose to still show the interstitial content while the browser is requesting permission.
Choose an Image
Click "CHOOSE IMAGE" to open your media library. Here, you can upload a new icon or select an icon previously uploaded.
To upload a new icon, click the upload primary action button. Click "Choose File" to browse your computer and find the icon. Select any tags to help you find the icon later or to add a new tag, just start typing and click "Create new tag". Click "Upload" to add the icon to your media library and use this for the overlay.
To use an icon you have previously uploaded, simply select the icon and click the tick primary action button. You can either scroll through your library or filter by the tags you have added previously.
Colors
You can customize the colors of the mask that will overlay the page whilst the browser is requesting push permission, the background color of the overlay, and the foreground color for text by clicking the appropriate color picker icon. Click "Confirm" once you have selected the desired color.
Links
You can add links to your privacy policy, for example, by clicking "ADD LINK". Enter a label and the URL for the link. If you want to add another link, click "ADD LINK" again. If you want to remove a link, click the trashcan icon next to it.
Click "Save" to add the prompt. The SDK will now show this prompt within one hour.
To force the SDK to update its prompt configuration sooner (during testing for example), simply visit the page, remove the promptUpdated key from local storage (in Chrome Developer Tools, go to the "Application" tab, under "Storage" expand "Indexed DB" and "Optimove") and then reload the page.
Quieter Messaging Overlay
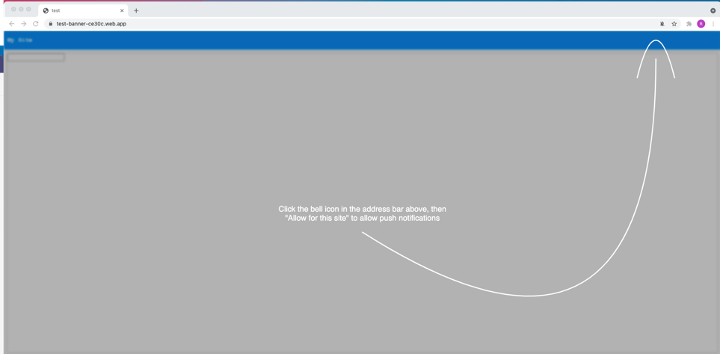
Additionally, you can display an alternative overlay to show in the Google Chrome browser when it requests push permission if quieter messaging is active.
This will instruct users of the website where to click the relevant prompt to allow the push permission as shown below:
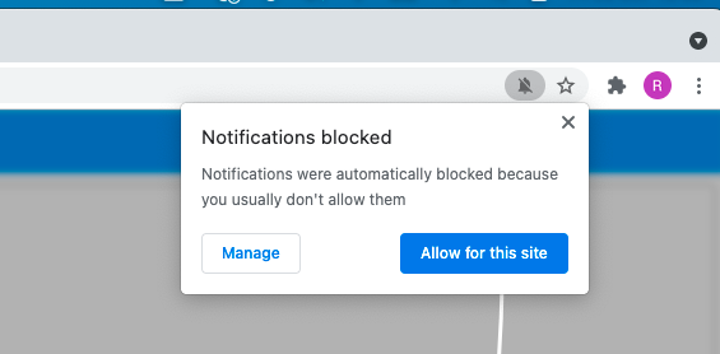
When a user clicks the blocked notification bell icon, permissions can then be given using the "Notifications blocked" prompt which is displayed:
This overlay can be toggled on by enabling the Silent Push Request Overlay panel, providing Body text as the message to display to the user, and the color preference for the text and arrow indicator shown:
Trigger
First, you need to select the event that should cause the prompt to show. This can be any analytics event tracked by your site (for example, a product purchase event) or when a page is viewed.
You can also match properties of the analytics event (for example, only a product purchased event where the value exceeds a given amount) or the URLs for the pages where the prompt should be shown.
To configure a prompt to show on all pages, you do not need to add any property filters.
To show the prompt on multiple or specific pages, select "Page Visit” as the event type. Now you can define the pages by setting the Property you would like to filter by (for example, Page URL) and setting "In" as the operator.
When filtering by Page URL, under Includes, you can add the paths for the pages where the prompt should be shown. This can be the complete path or a wildcard. For example, to show the prompt on where the URL path starts blog or news:
- Enter /blog/* and click "Create /blog/*"
- Enter /news/* and click "Create /news/*"
- Click "Add"
If you do not want the prompt to show immediately on the page, toggle "Delay showing" and enter how many seconds to wait before showing the prompt.
Re-engagement options
This option will allow you to configure what happens if the user declines an alert or a banner prompt and whether to show the user the same prompt again after a set time period or never to display it to the user again.
Bell prompts do not have this option, as there are no action buttons that are configured with bell prompts.
Edit or Delete a Prompt
To edit or delete a prompt, expand "Messaging" in the left menu, select "Configuration", navigate to the "Web Push" tab, expand the context menu next to the prompt, and select edit or delete as appropriate.
The SDK will update its prompt configuration in up to one hour.
Customize Web Push Icon
To customize the icon displayed with web push notifications, expand "Messaging" in the left menu, select "Configuration", and click the settings cog next to the web icon.
You can either enter the URL to the icon or use your media library. Click "Choose/Upload Icon" to open your media library. Here, you can upload a new icon or select an icon that you’ve previously uploaded.
To upload a new icon, click the upload primary action button. Click "Choose File" to browse your computer and find the icon. Select any tags to help you find the icon later, or to add a new tag, just start typing and click "Create new tag". Click "Upload" to add the icon to your media library and use this for your web push notifications.
To use an icon you have previously uploaded, simply select the icon and click the tick primary action button. You can either scroll through your library or filter by the tags you have added previously.
Click "Configure" when done.
You can override this default icon when sending a notification.