
Please note:
To unlock this capability, you will need to have added Web Push Notifications to your Optimove package. If you can’t see this feature in your Optimove instance, contact your CSM to find out more.
By creating personalized web messaging campaigns based on Optimove’s powerful Target Groups, you can customize the content of your web push notifications sent via Mobile using “personalization tags.” These tags allow you to create templates that change dynamically for each individual recipient.
For example, you can customize the message with the recipient’s first name, which can lead to increased opens and engagement.
Preparing to Use Mobile Personalization Tags
Once your CSM has set up your tags, you will be able to use them in any web push message.
To set up Customer Attributes as tags:
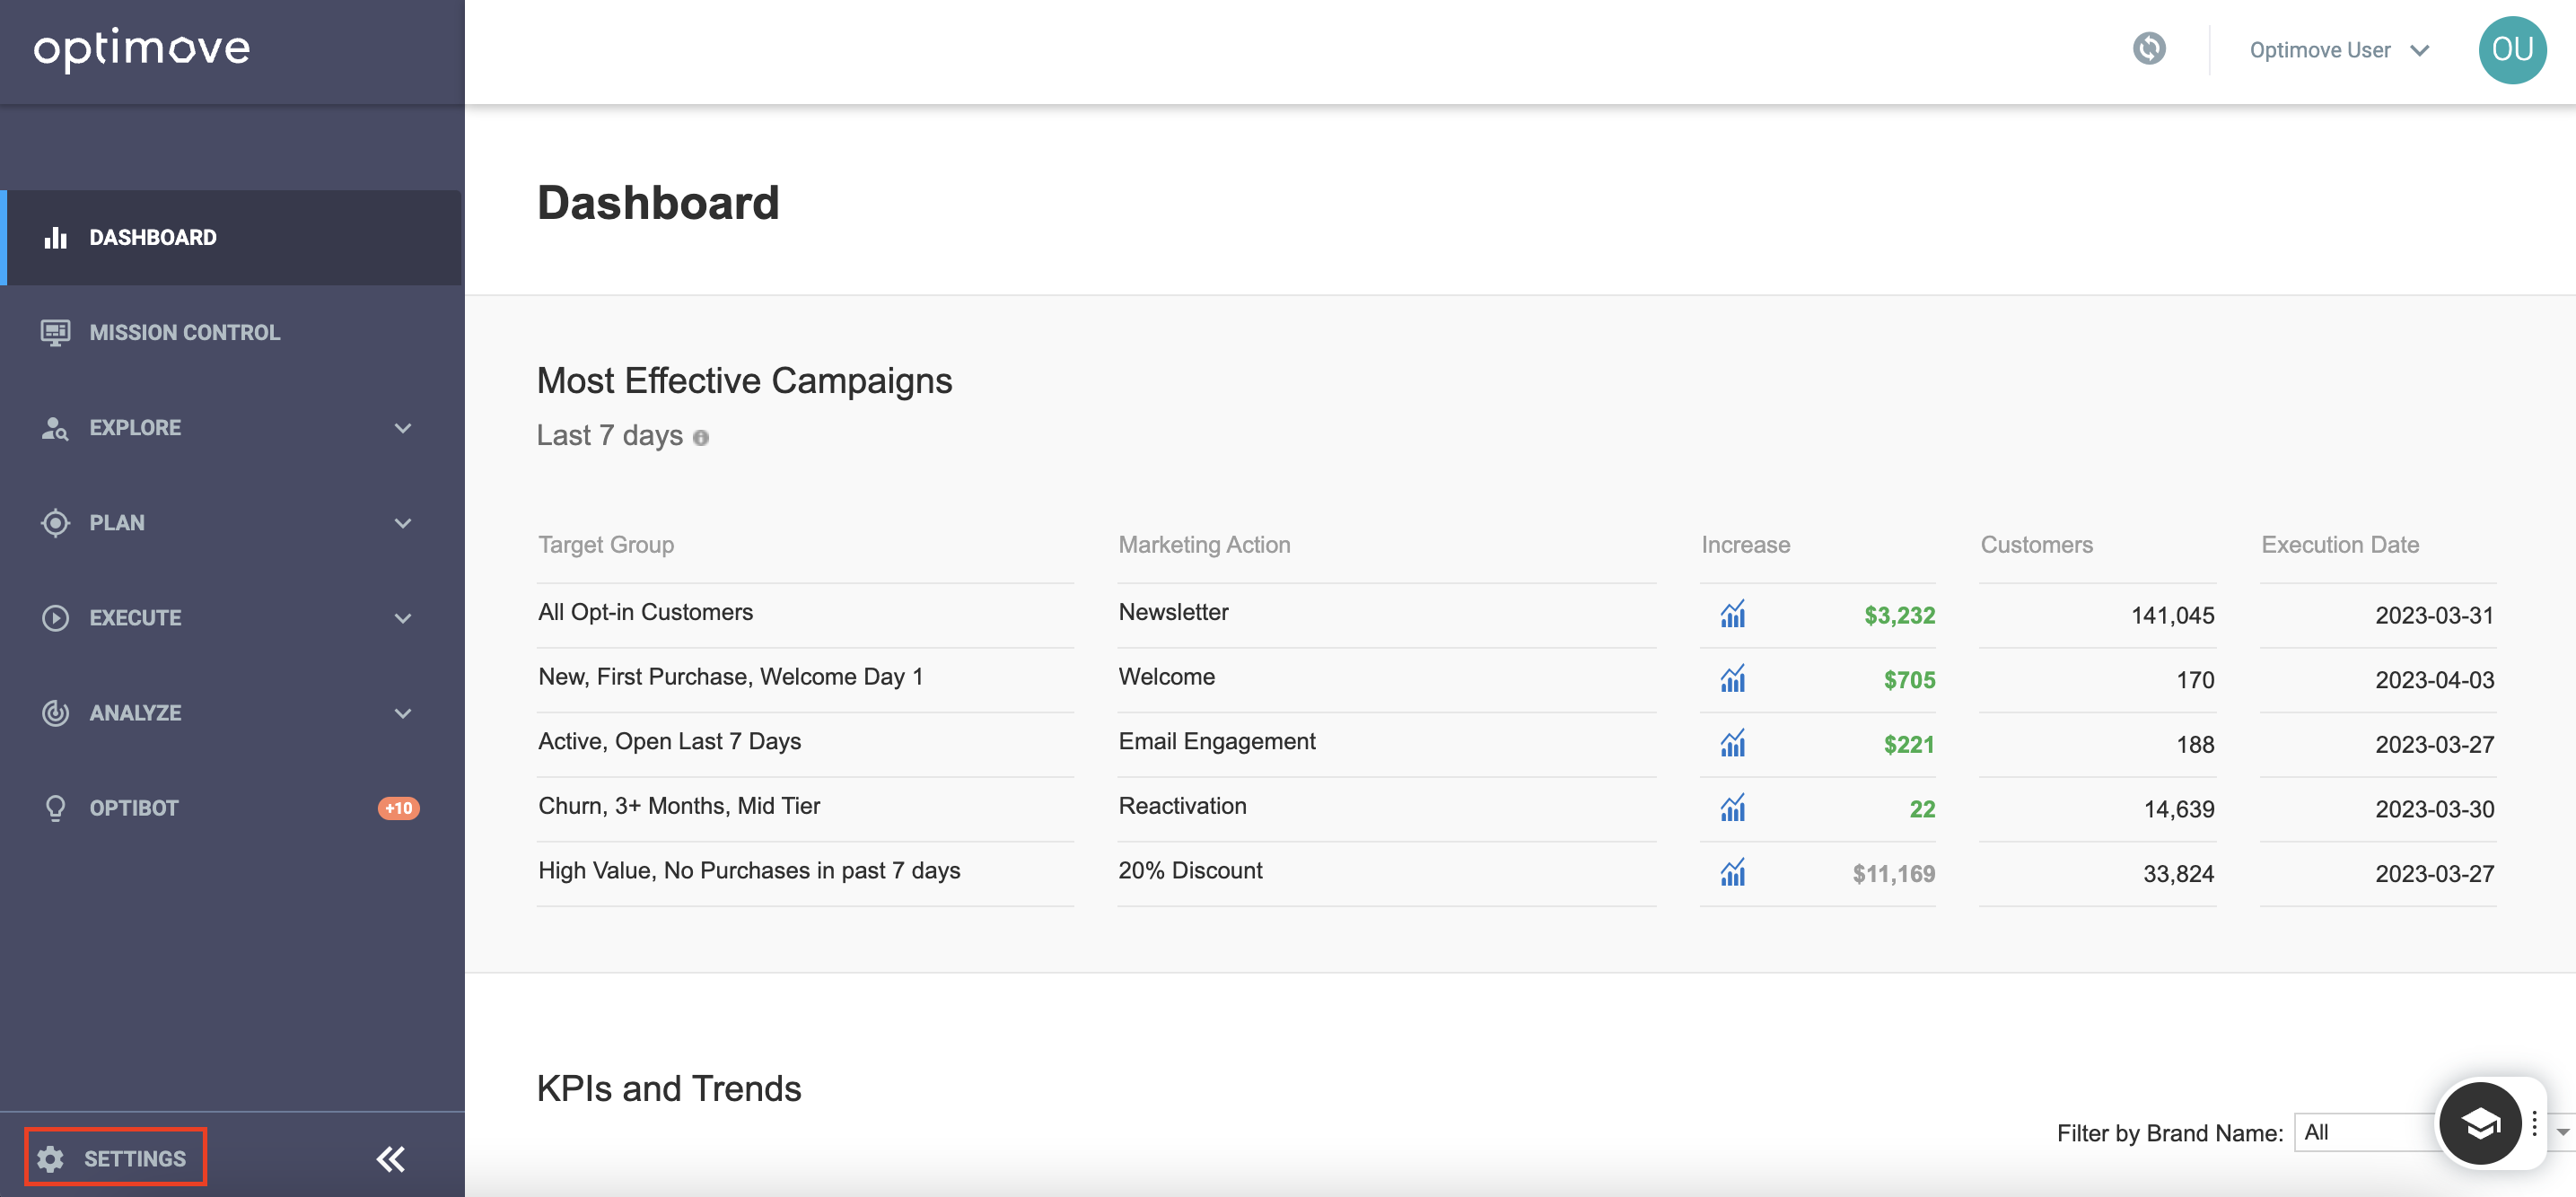
1. Go to the Settings section via the cog symbol in the bottom left corner
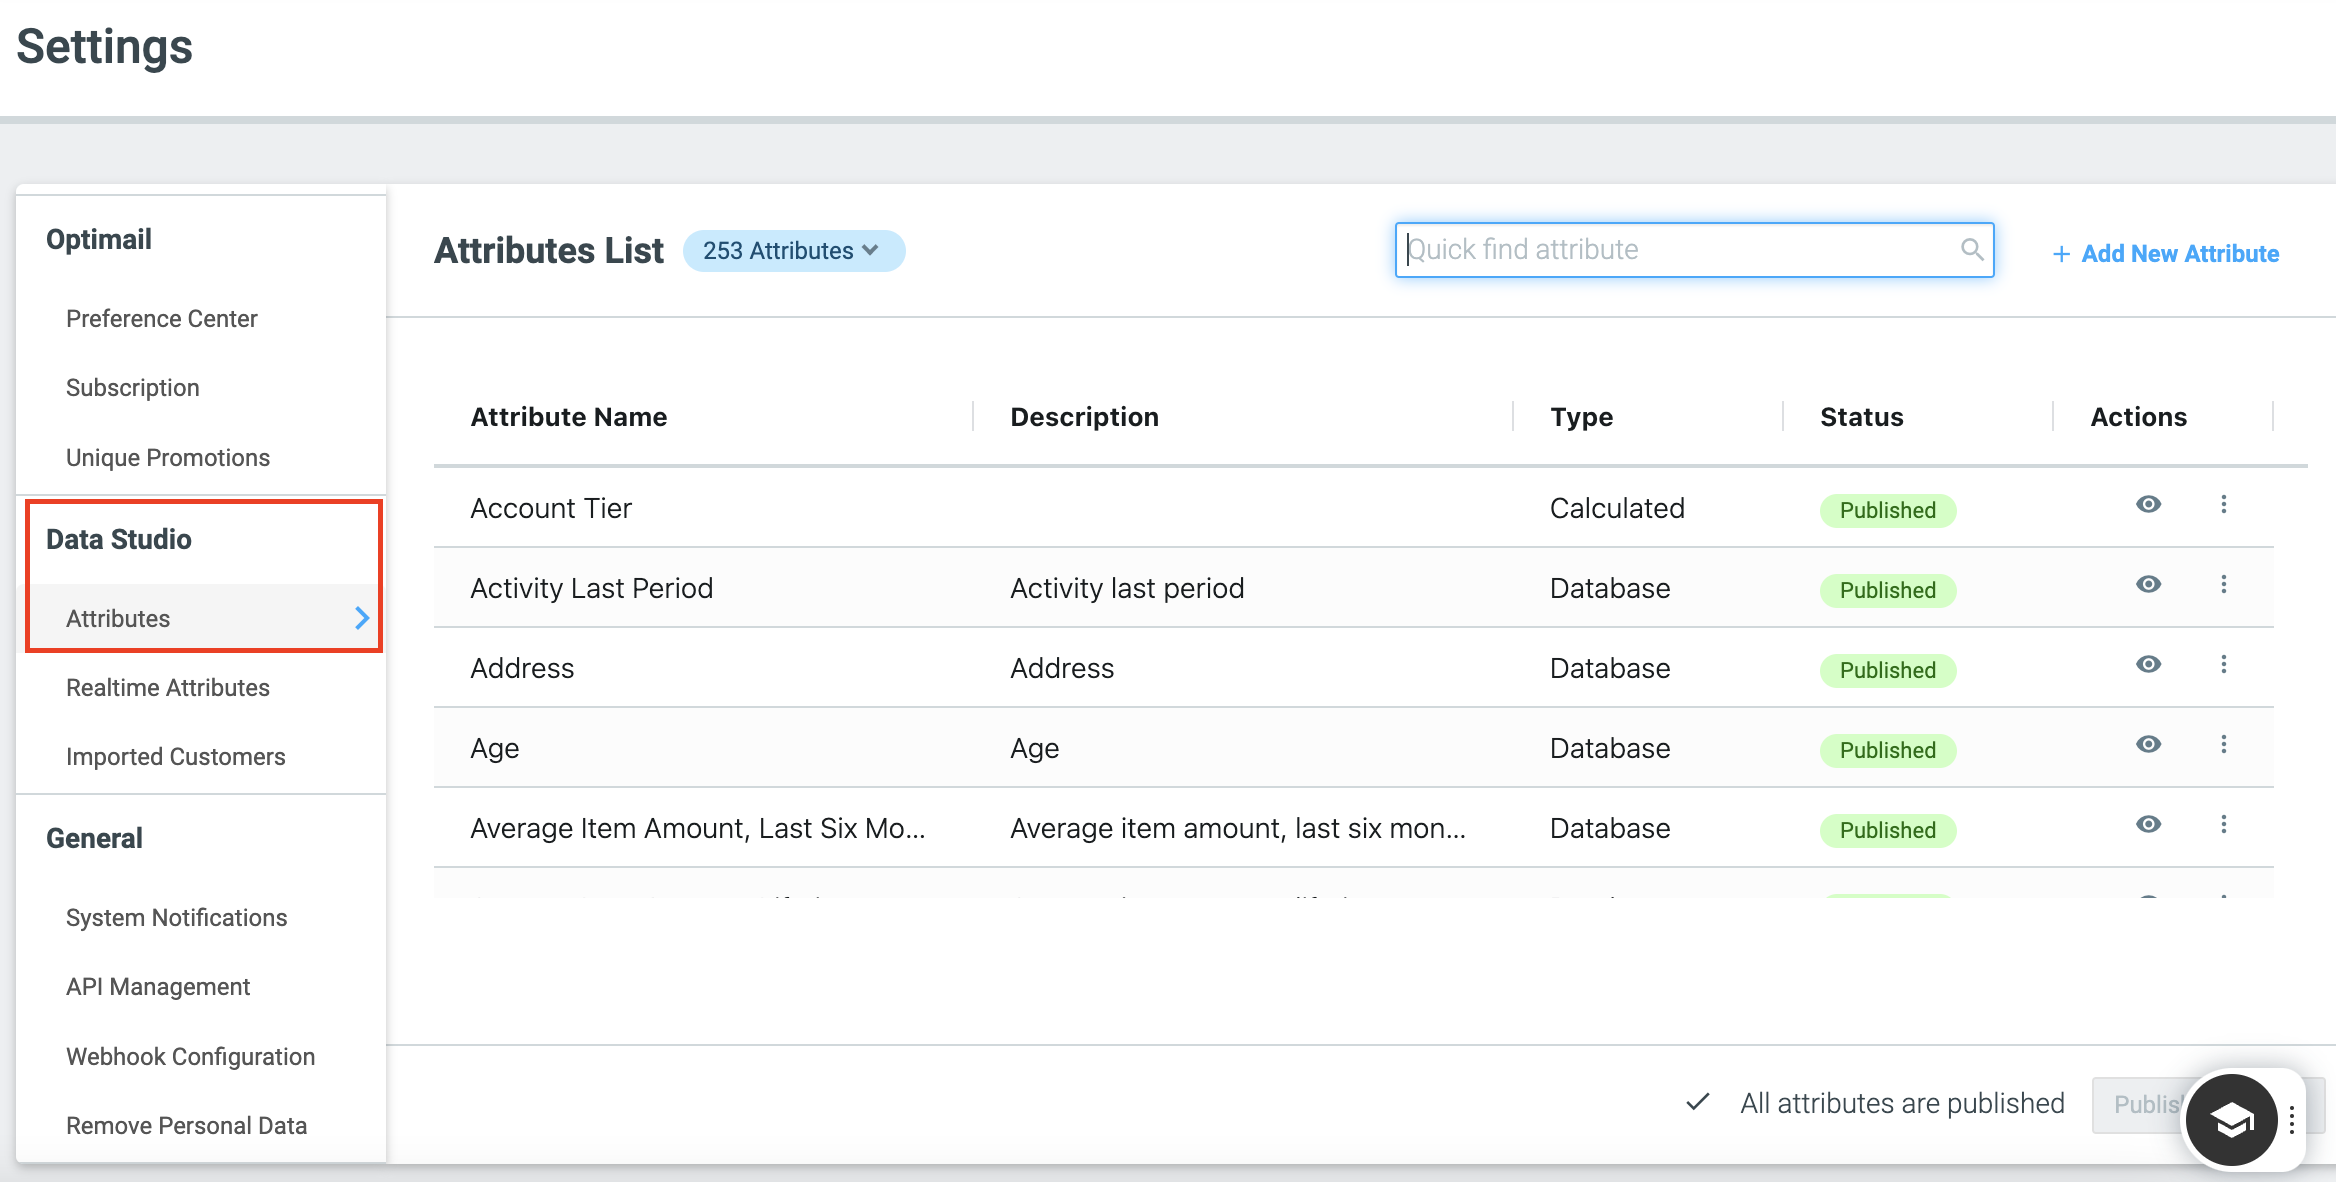
2. Click on the Attributes management area under Data Studio
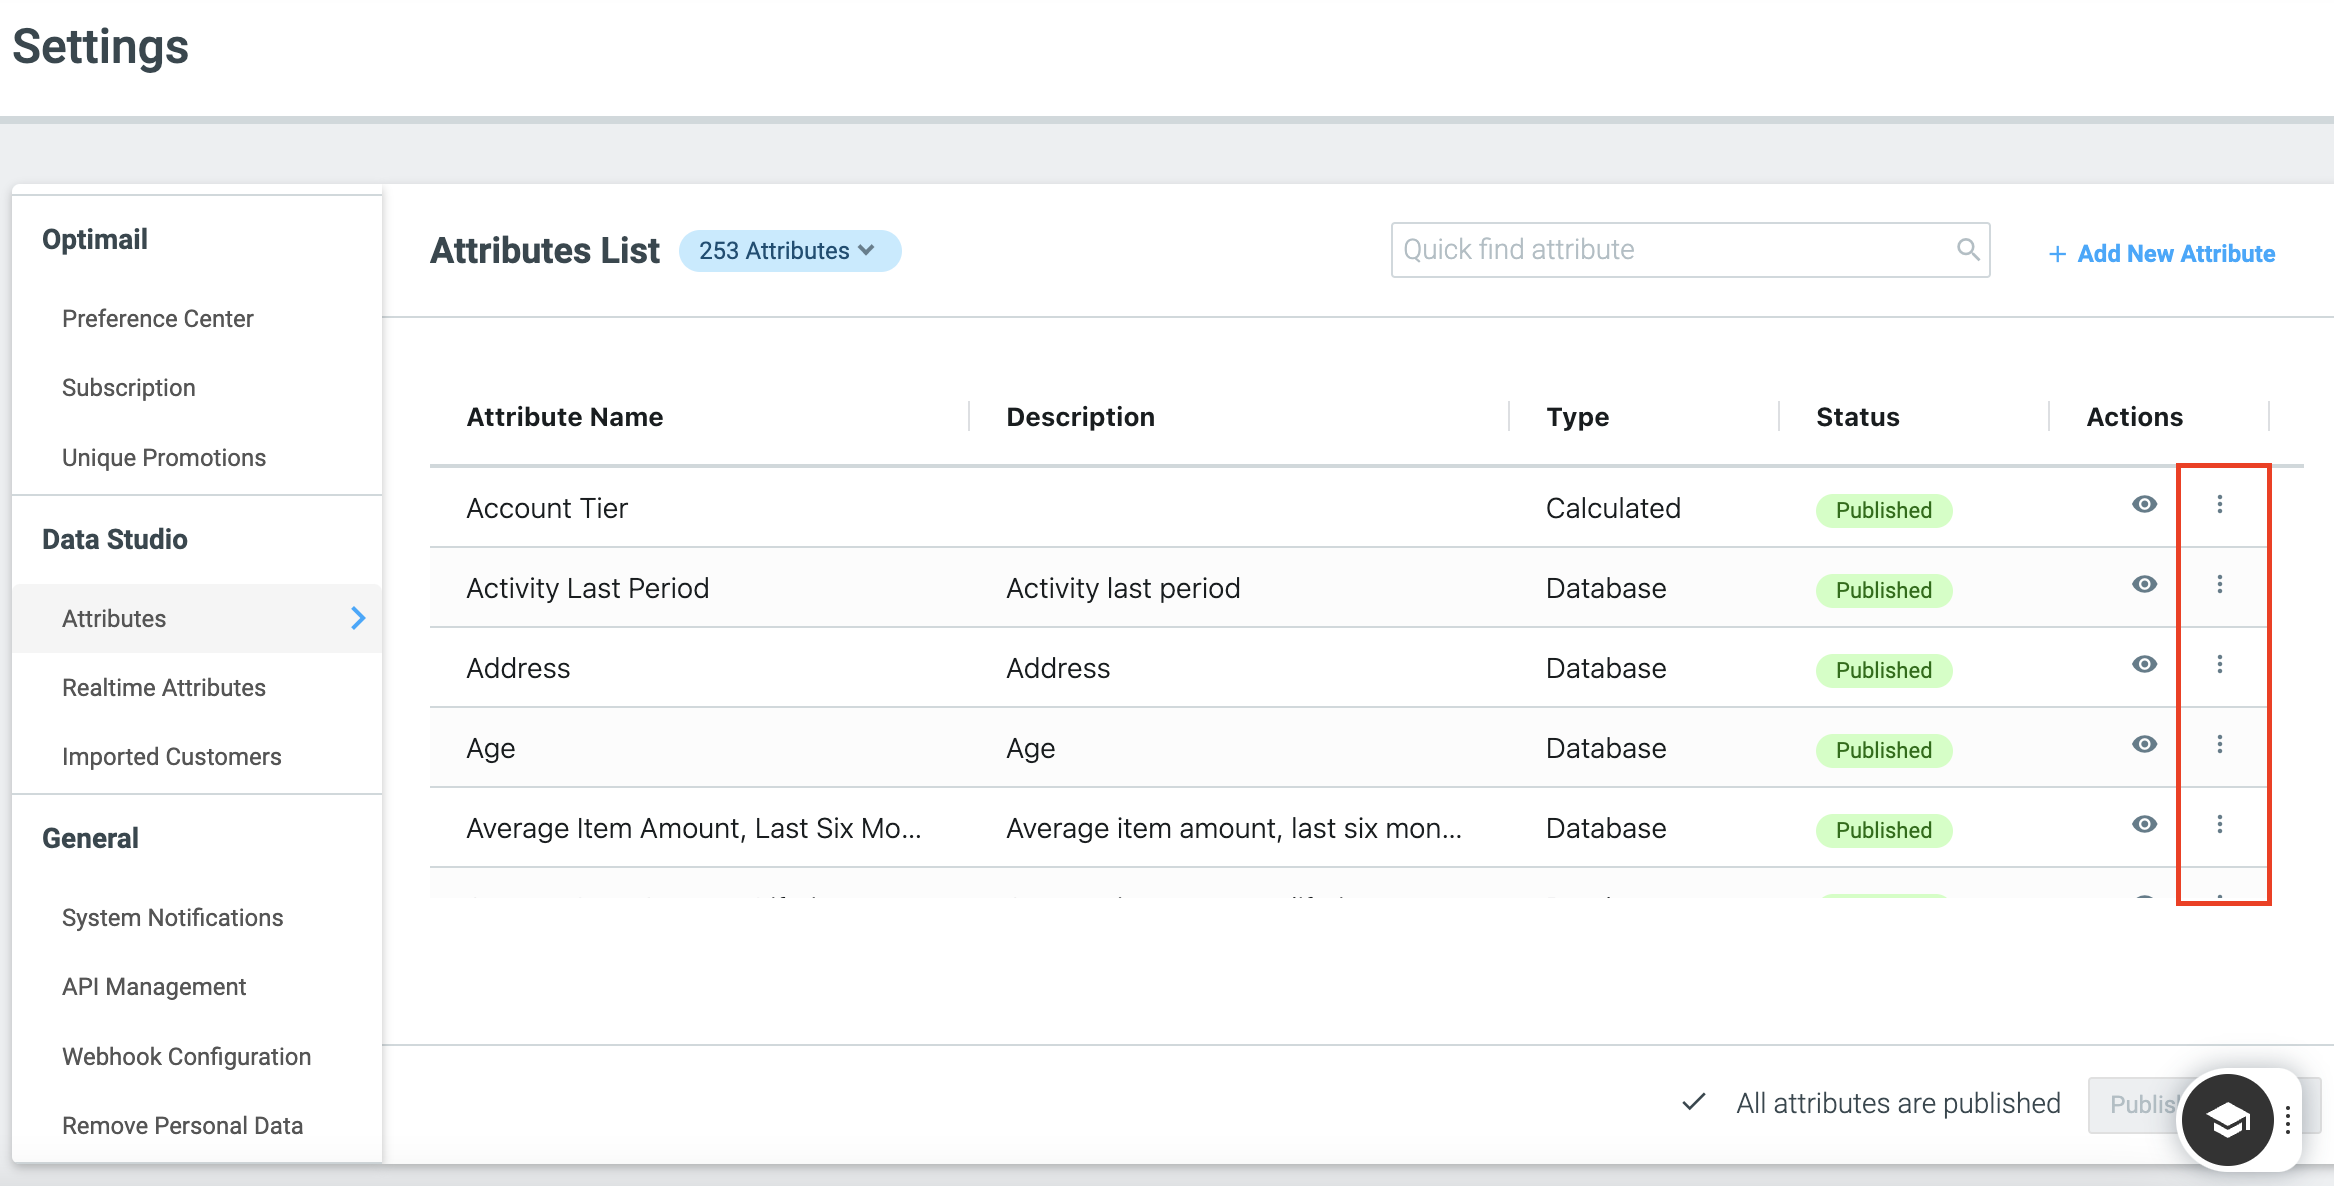
3. Click the three dots on the Attribute you would like to use as a Personalization Tag. Please note that only published attributes can be set as personalization tags.
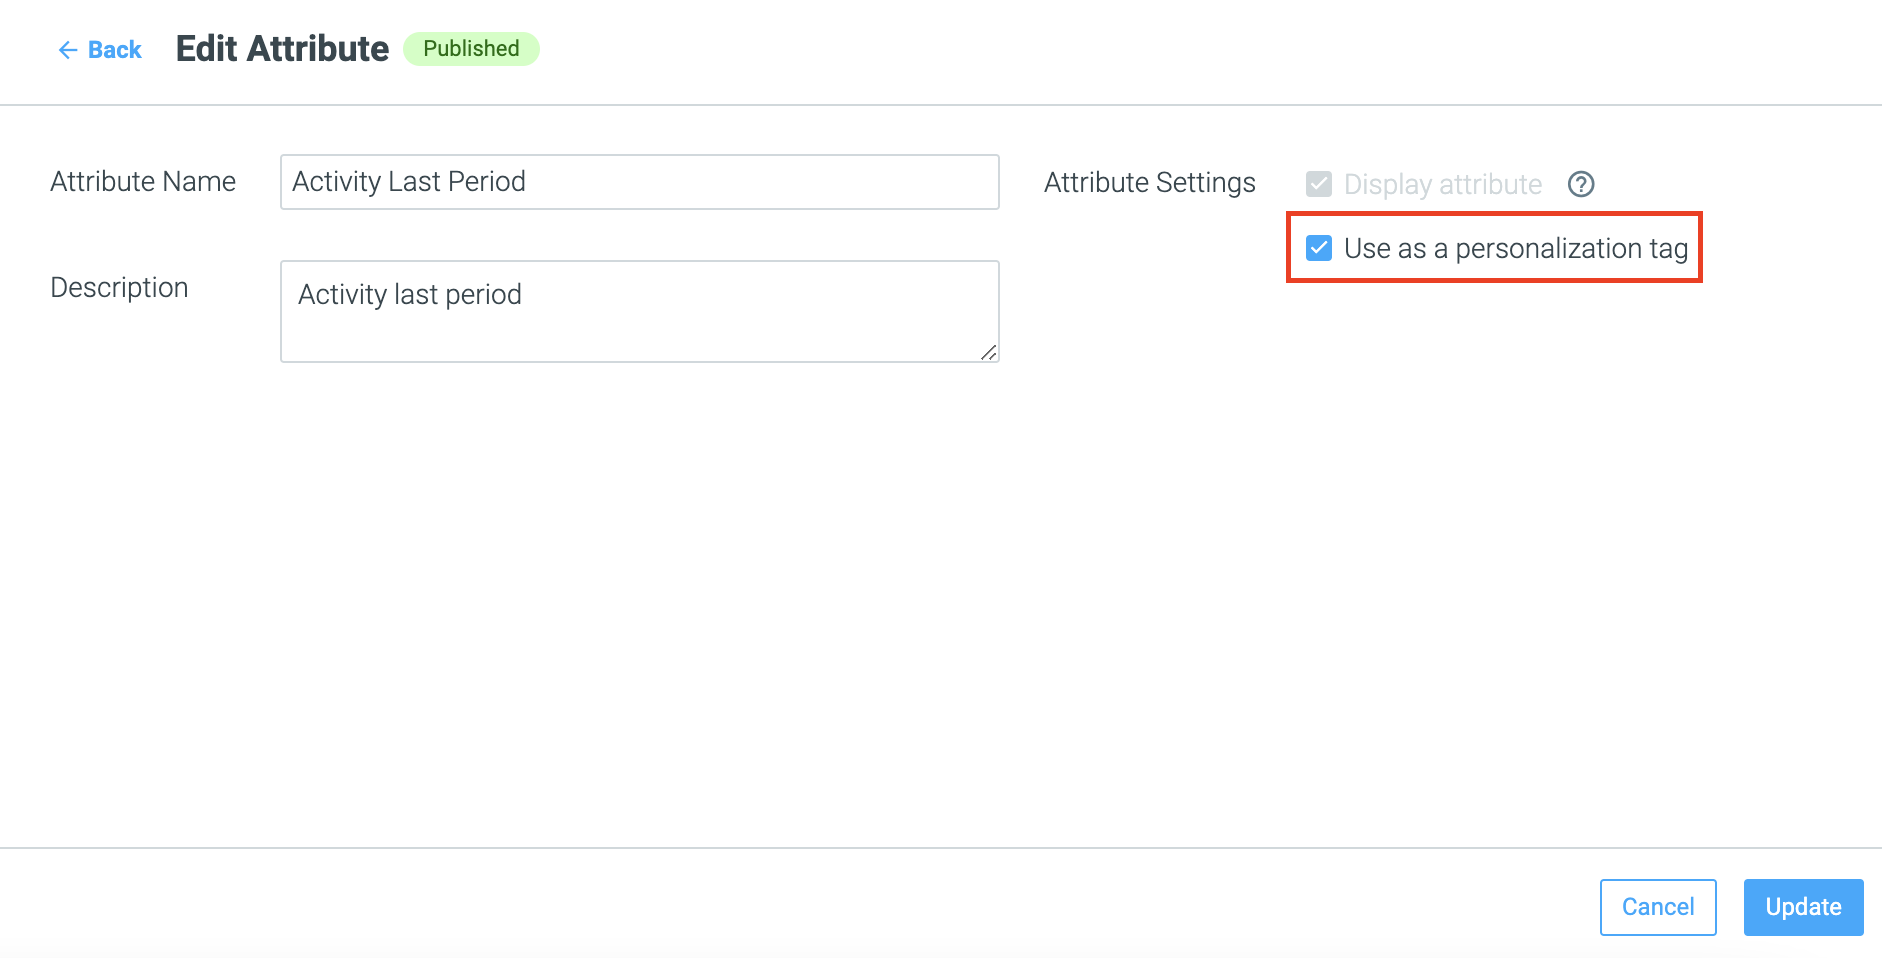
4. Check the “use as personalization tag” checkbox and click the Update button to save your work.
Did you know?
You can also use real-time customer attributes to personalize your mobile push notification templates, to show the most up-to-date live data you have on your customers. Learn more about using real-time customer attributes here.
Please note:
Currently, personalization tags can only be used in Web Push Notifications and Mobile Push Notifications. Personalization tags for In-App Messages are coming soon.
Personalizing Your Template
Once you’ve set up your tags, you can use them in any of your web push notification campaigns.
1. While editing a push notification template (this process applies to both mobile push and web push), click on Personalization within the template editor.
2. From here, select the Personalization Tag you’d like to add from the dropdown menu, or from here you can also add Content or General tags, for example, the Current Date.
3. You can, at this point, add a default value for your Personalization Tag and select a Content Function for your Personalization Tag to determine if it should be upper, lower, or title case within the web push notification. Click Confirm to add the tag to your message.
4. When you have added your Personalization Tag, it will be highlighted in the Template Editor and the Preview.
Please note:
You cannot check the data behind the personalization tag in the Preview. You can view the data behind your Customer Attributes in the Customer Explorer.