
This document describes how to integrate Optimove with Azure AD’s identity provider to implement a SAML-based Single Sign-On (SSO) flow in Optimove.
Follow these instructions to prepare your AzureAD account for integration with Optimove.
Setting Up the Integration in Azure AD
- Create a user in Optimove
- Sign in to your Azure account at portal.azure.com
- Under Azure Services, go to Azure Active Directory
- Go to Enterprise Applications
- Click “New Application”

- Select “Azure AD SAML toolkit” in the options
- Name it and approve.
- Return to “All Applications” and select the new application you just created
- Click “Get Started”
- In the “Single Sign On” tab in the menu, your new application can be configured.
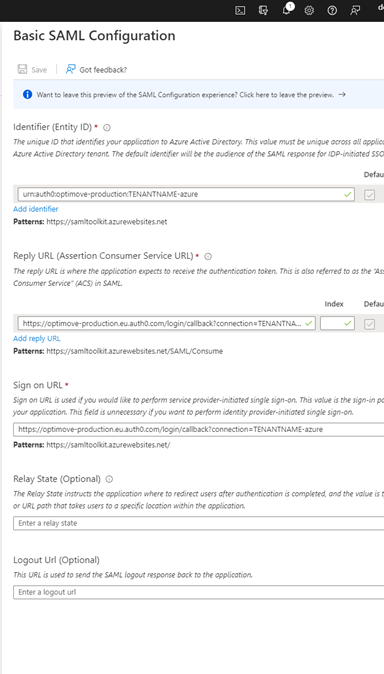
Basic SAML Configuration
In the below steps, please replace XXXX with the name of your Optimove site - XXX.optimove.net, make sure to use lower-case letters
- identifier - urn:auth0:optimove-production:XXX-azure
- Reply URL - https://optimove-production.eu.auth0.com/login/callback?connection=XXX-azure
- Sign on URL - https://optimove-production.eu.auth0.com/login/callback?connection=XXX-azure
11. Click on "Add new claim" and set the following
- Name: email_verified
- Source = Attribute
- Source attribute: true
12. Download the SAML certificate (Base64)
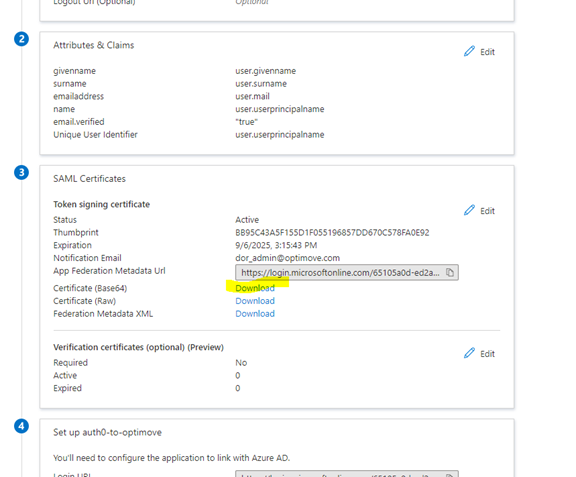
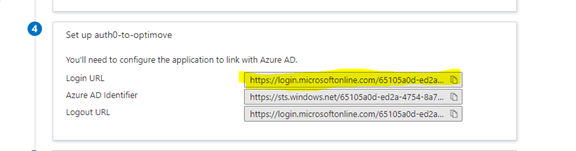
13. Under "Set up auth0-to-Optimove, copy and save the “Login URL”.
14. Go the the "Users & Groups" tab
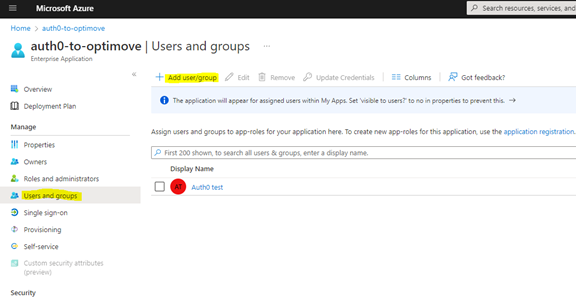
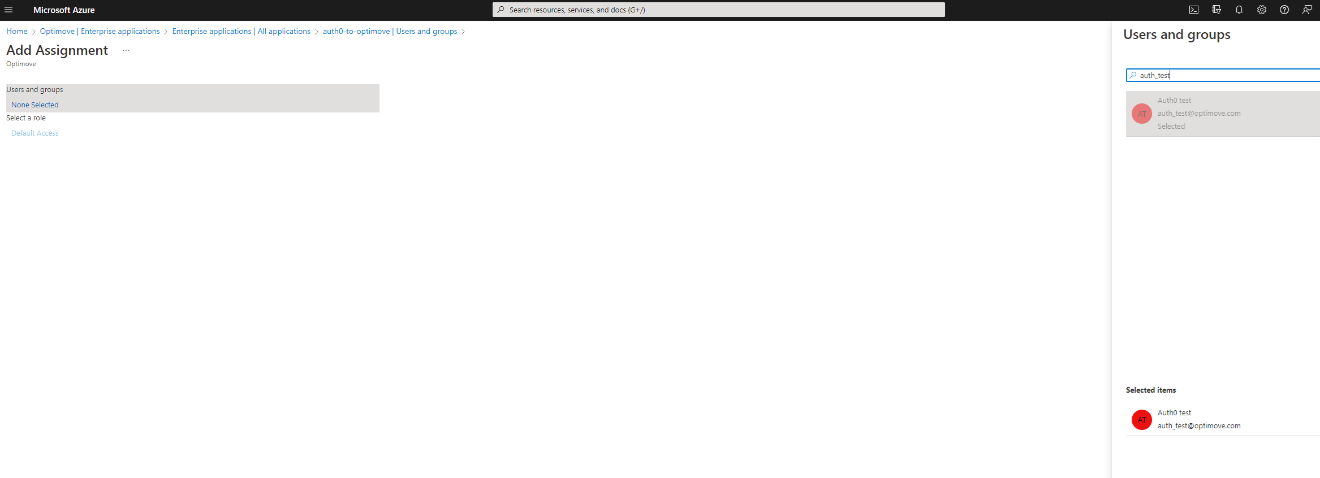
15. Select the users you would like to assign to this connection (users must exist also in the Optimove application)
Please use the Information you copied and share it with the Optimove team in the following form to open a ticket: https://form.jotform.com/252882844193063
Optimove will then notify you once the configuration is ready and schedule a date to turn on the SSO connection.
Optional –You may add a test user credentials in the form; this test user should be created by you in both Optimove and Azure with Optimove as the assigned application; this user will be used to test the integration by the Optimove team