
This document describes how to integrate Optimove with JumpCloud’s identity provider to implement a SAML-based Single Sign-On (SSO) flow in Optimove.
You can follow these instructions to prepare your JumpCloud account for integration with Optimove.
Setting Up the Integration in JumpCloud
- Log in to your JumpCloud account
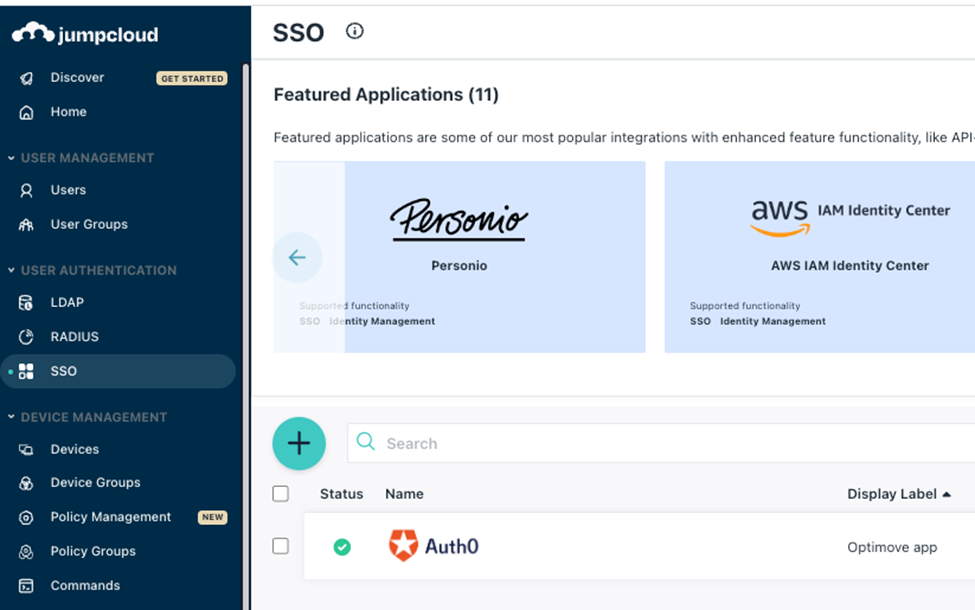
- Under User Authentication, go to SSO
- Press the "+" button
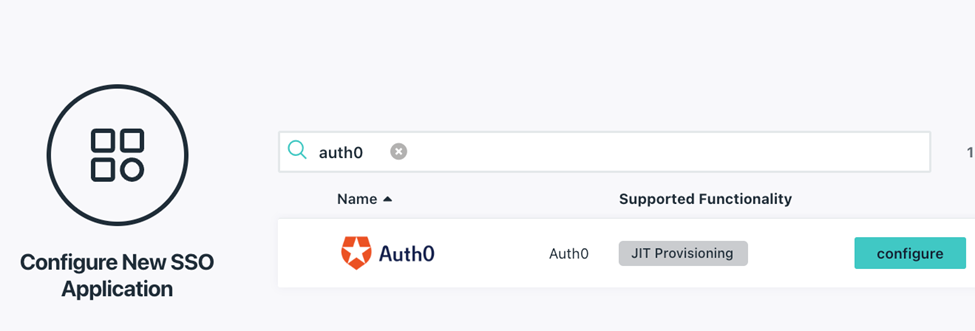
- Search for Auth0 and press configure
- Under General Info, set the Display Label as "Optimove Site"
- in the Application Name field, type "Optimove Site"
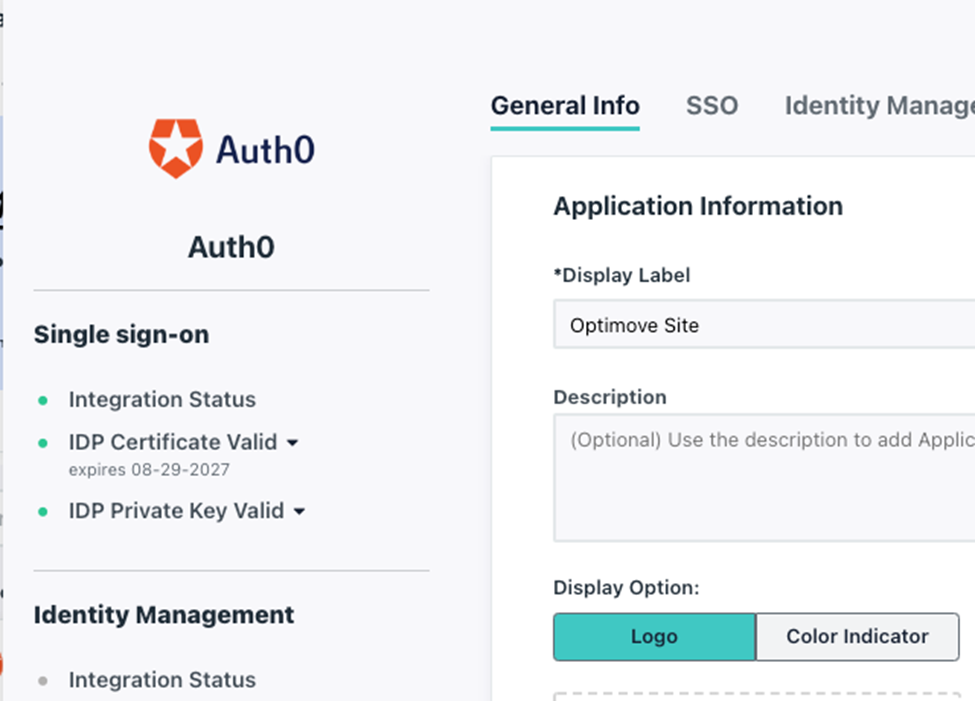
- Upload the Optimove logo (use the replace logo button)
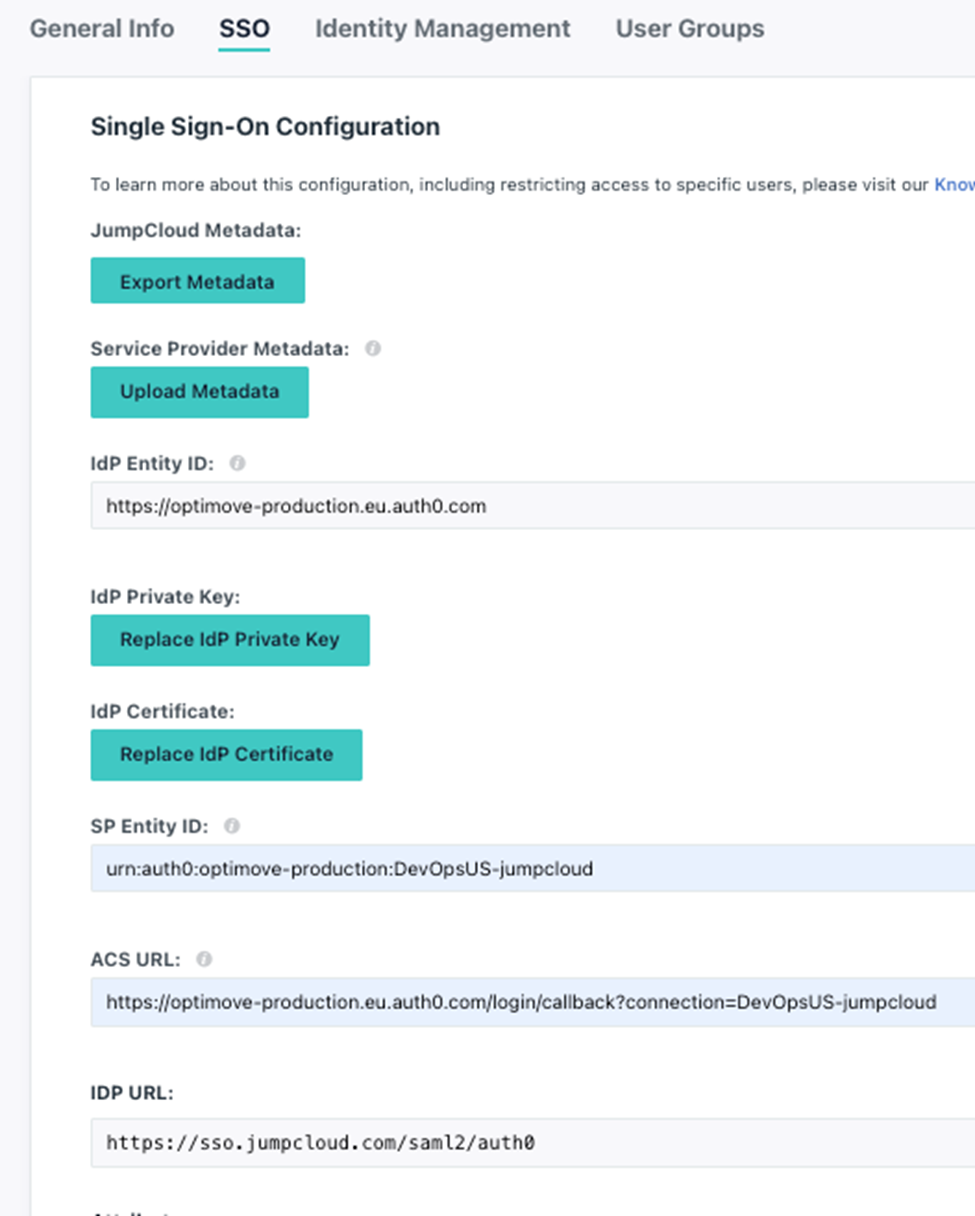
In the steps below, please replace XXX with the name of your Optimove site - XXX.optimove.net; make sure to use lower-case letters
8. Change to the SSO tab and set the following values:
- Idp Entity ID: https://optimove-production.eu.auth0.com
- SP Entity ID:urn:auth0:optimove-production:XXX-jumpcloud
-
ACS URL: https://optimove-production.eu.auth0.com/login/callback?connection=:XXX-jumpcloud
9. In User Attribute Mapping, add the following attributes:
email: email
emailaddress: email
10. Under Constant Attributes, add the following attribute:
email_verified: true
11. Under "User Groups" tab check the groups you want to grant permissions to the Optimove site.
12. Click "Activate"
It is recommended to create a test user in Optimove and JumpCloud platforms, and share the credentials with Optimove for testing.
13. Share the following details with Optimove
- IDP (Identity provider) Single-sign-on URL (your JumpCloud URL)
-
X509 Signing Certificate - MUST BE IN PEM or CER format
Please use the Information you copied and share it with the Optimove team in the following form to open a ticket: https://form.jotform.com/252882844193063
Optimove will notify you once the configuration is ready and schedule a date to turn on the SSO connection.