
Email Preference Center
We advise implementing the Email Preferences Center to ensure that customers can opt in or out of specific emails instead of opting out of all communications at once. This way, you'll be able to minimize the number of customers who opt out of all communications.
Email Customer 360 Consent History
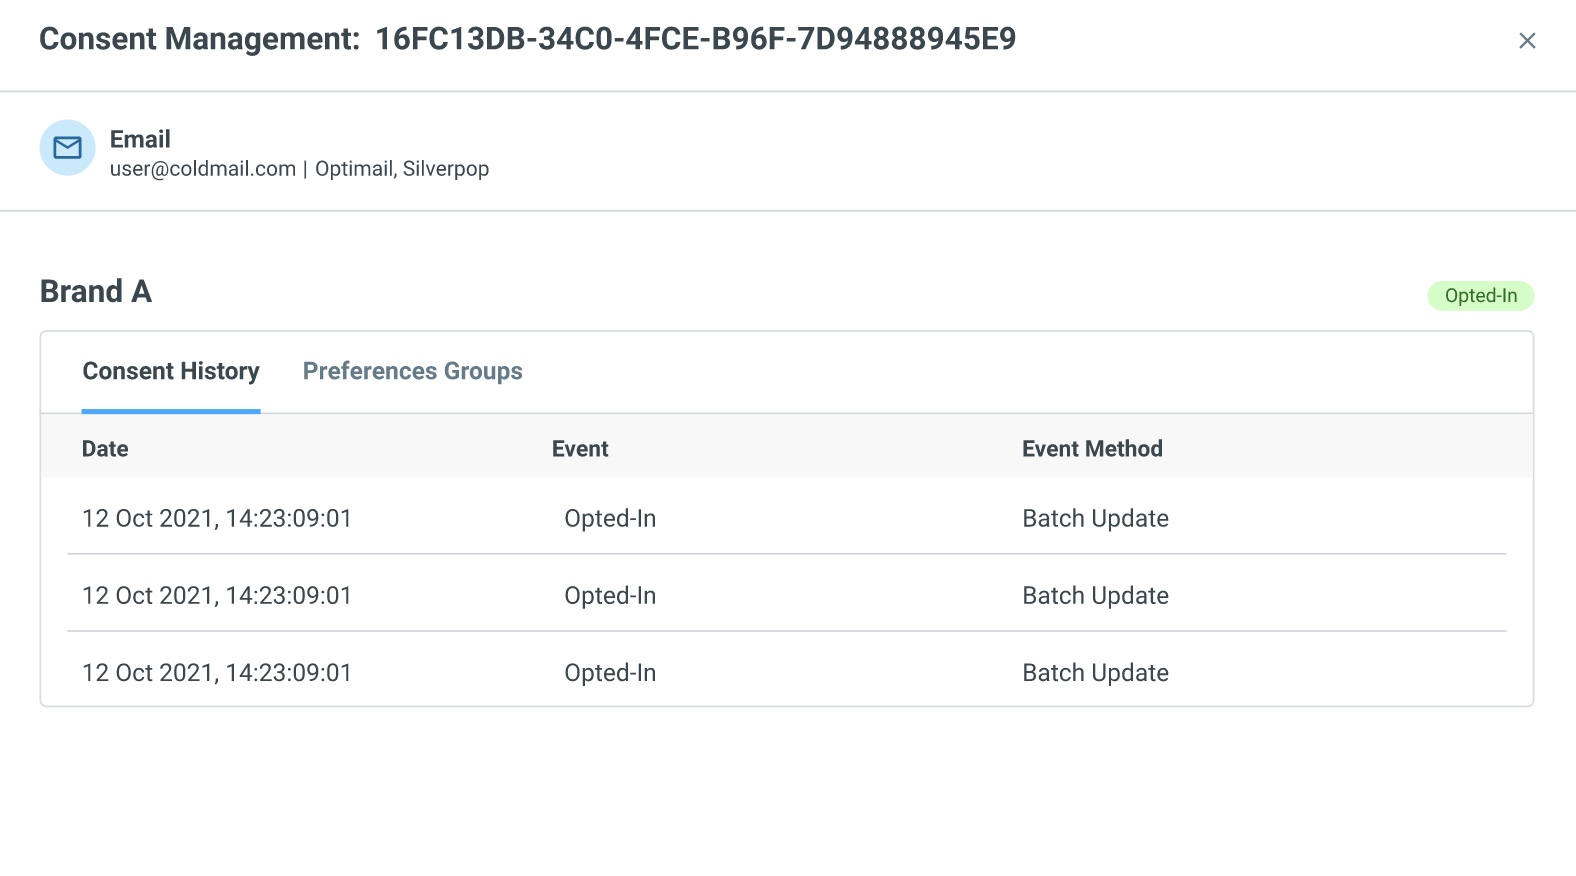
You can check the consent history of every client by using the Customer 360 screen. In the new tab, you can find your users’ current subscription statuses, as well as previous statuses and the source of the subscription.
Managing the Unsubscribe List
As part of your Email configuration stage, you will be required to choose how you'd want to manage the unsubscribe list:
The Unsubscribe List Is Managed by You
If you manage unsubscribes on your own and wish to sync your unsubscribe list with Optimove, you have several options available: API, real-time events, CSV file upload, or including the data in your batch uploads. Please reach out to your CSM to discuss which method is best for your needs.
The Unsubscribe List Is Fully Managed by Optimove
If Optimove manages the unsubscribes, and a customer clicks on Optimove's unsubscribe link, the global unsubscribe list related to your brand will be updated by default.
1. The Optimove Unsubscribe Link
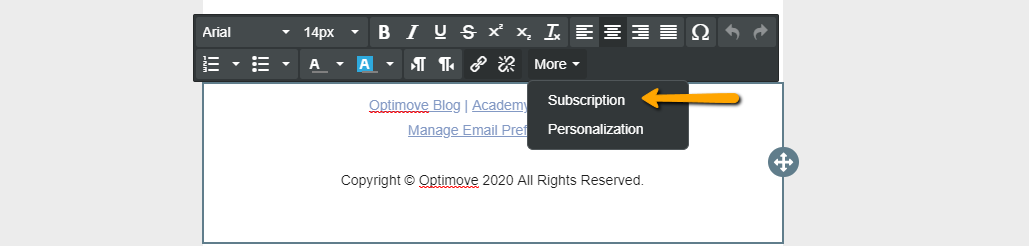
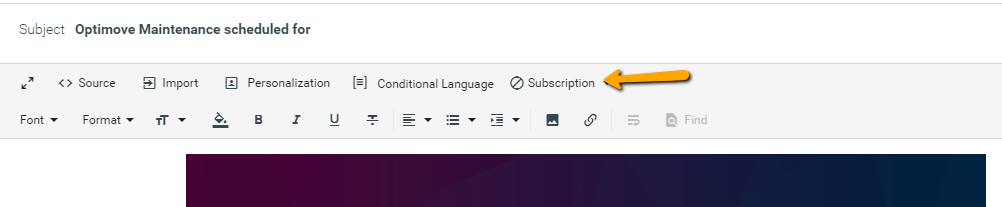
Optimove automatically tracks which customers click on the unsubscribe link in your emails. Once a customer clicks on the unsubscribe link, Optimove adds their email address to your brand’s global unsubscribe list.
2. Updating the Unsubscribe List Using the API
An additional option to keep Optimove's unsubscribed list updated is by setting up this API call.
- For more information on how to pull the unsubscribe list via API, read our documentation.
- For more information on how to add unsubscribers via API, read our documentation.
- For information on how to delete unsubscribers via API, read here.
3. Updating the Unsubscribe List using a Real-time SDK Event
You can easily set a real-time event and update your unsubscribe list immediately after your customer has taken a specific action.
|| For example:
Your user can decide to unsubscribe by clicking on a dedicated toggle/button. After the click, Email will receive the event and update the subscription list in real-time.
optimoveSDK.API.reportEvent('consent',
{
"opt_in": false/true,
"brand": "brand Id",
"event_origin": "sdk",
"identifier": "email address",
"execution_method": "email",
"channel_id": 15})
Please note:
We will update both unsubscribes and subscriptions based on your customers’ actions. To be able to update the Unsubscribe List using the SDK event, you must already be using Track and Trigger.
You can also update the subscription status of each customer in real-time using a server-side API event. Find out more about the Consent Management server-side event here.
4. Update your Unsubscribe List by sending the users as part of the batch data update file
You can include your most updated subscription status for every user by sending it through the batch data update. By doing that, our system will update the Email Unsubscribe attribute with the latest information once a day.
- Email address
- Timestamp - dd/mm/yy - hh:mm (time and date)
- Subscription status - Opt-in = true/false
5. The Subscription section on the Settings screen
Add or remove unsubscribers using a CSV list directly from your Optimove site via the Subscription section in your Settings area (available for Admins only).
- Go to the Subscription section in the Settings area
- Choose the brand you’d like to update
- Select whether you would like to add unsubscribers or re-subscribers
- Upload a CSV file with the relevant email addresses
|| Please note: the changes will take place in real-time.
Extracting a List of Your Unsubscribed Customers
Using the Customer Explorer
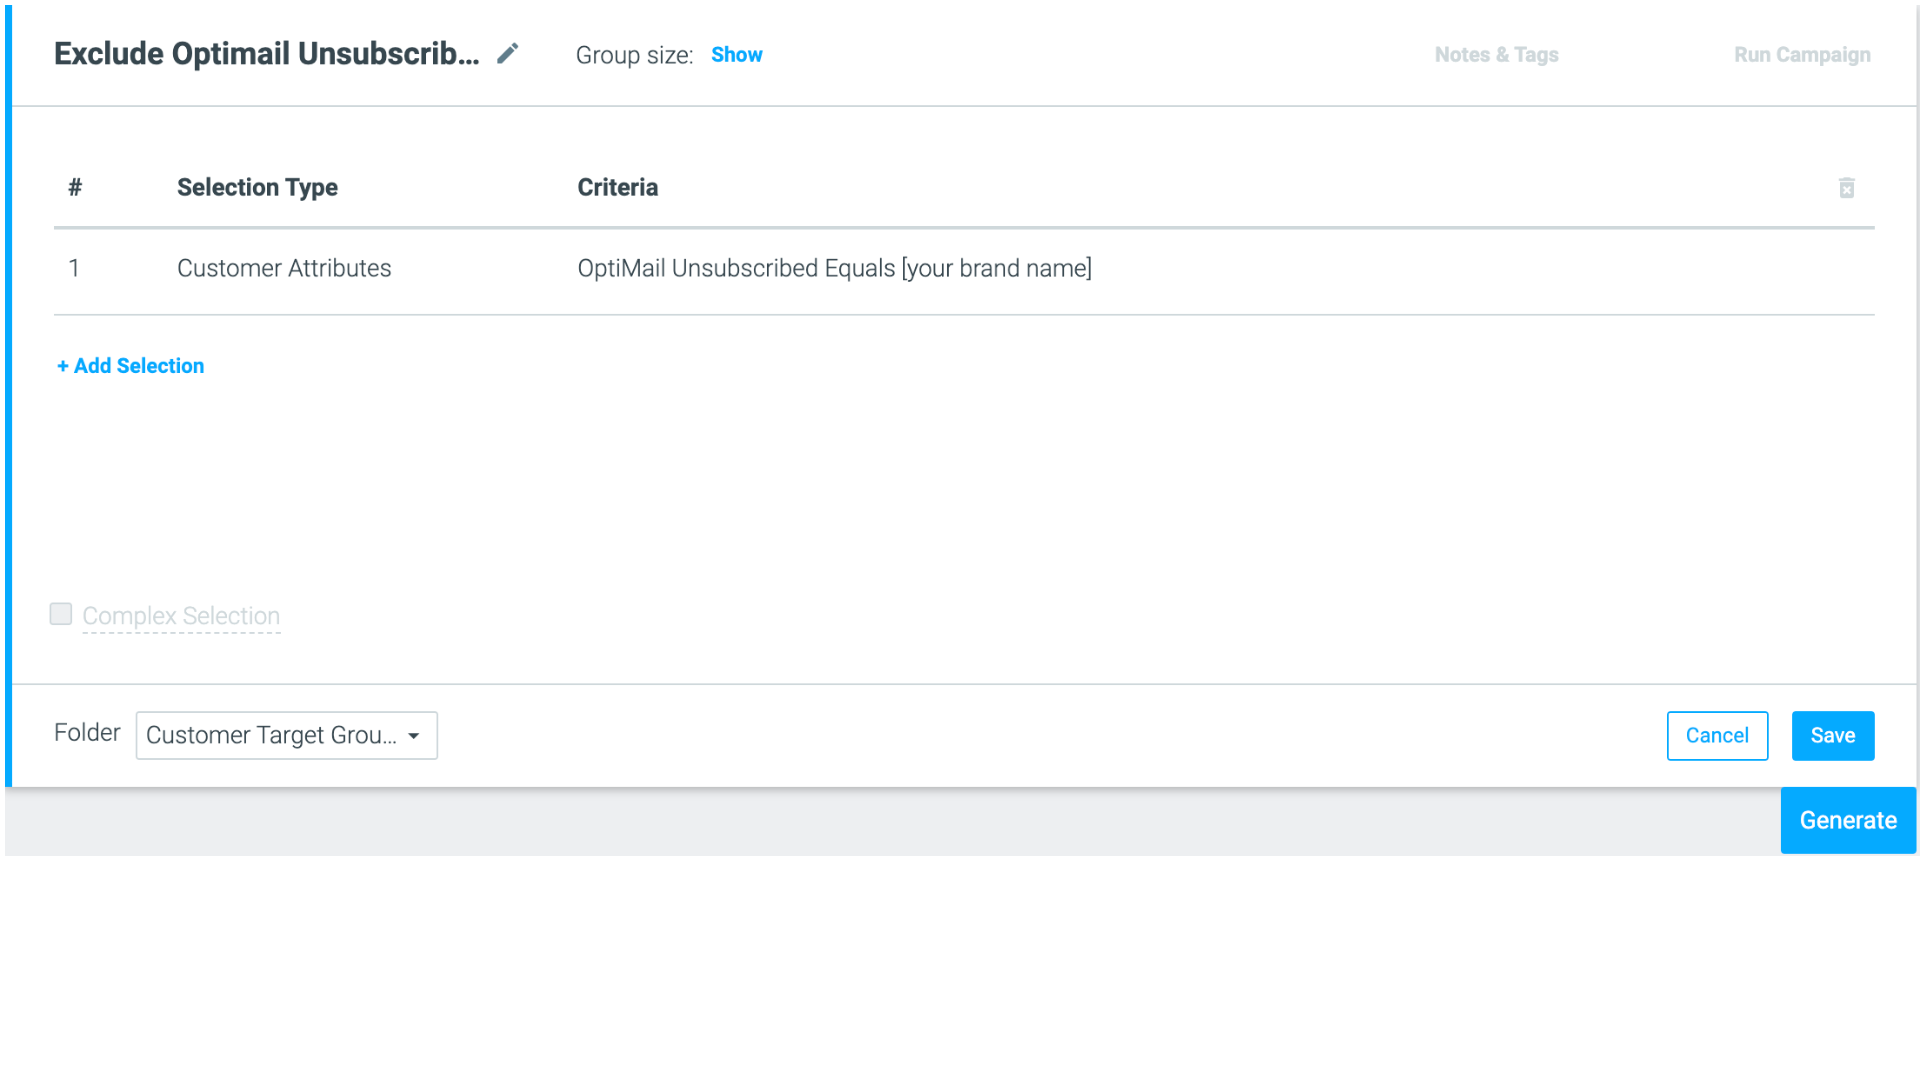
Every customer within your customer base is assigned a dedicated attribute called “Email Unsubscribed”. Therefore, you can build a Target Group and export the list of unsubscribed customers.
1. Go to the Customer Explorer
2. Add the customer attribute: “Email Unsubscribed” Equals [your brand’s name], as shown in the image below
Please note:
If you would like to use the Email Unsubscribed attribute in order to filter the unsubscribed users out of another Target Group, the criteria should be: “Email Unsubscribed” Does not equal [your brand’s name]
3. Download the list as a CSV
Using the Settings Area
This option is available for Admins only:
1. Go to the Settings area.
2. Under Subscription, choose the relevant list and click “Export unsubscribe list”
3. Choose the time range and click Export.