
Setting Up the Integration
To use the Optimove-Zendesk integration, perform the following steps:
- Ask your CSM to provide you with an HTTP endpoint.
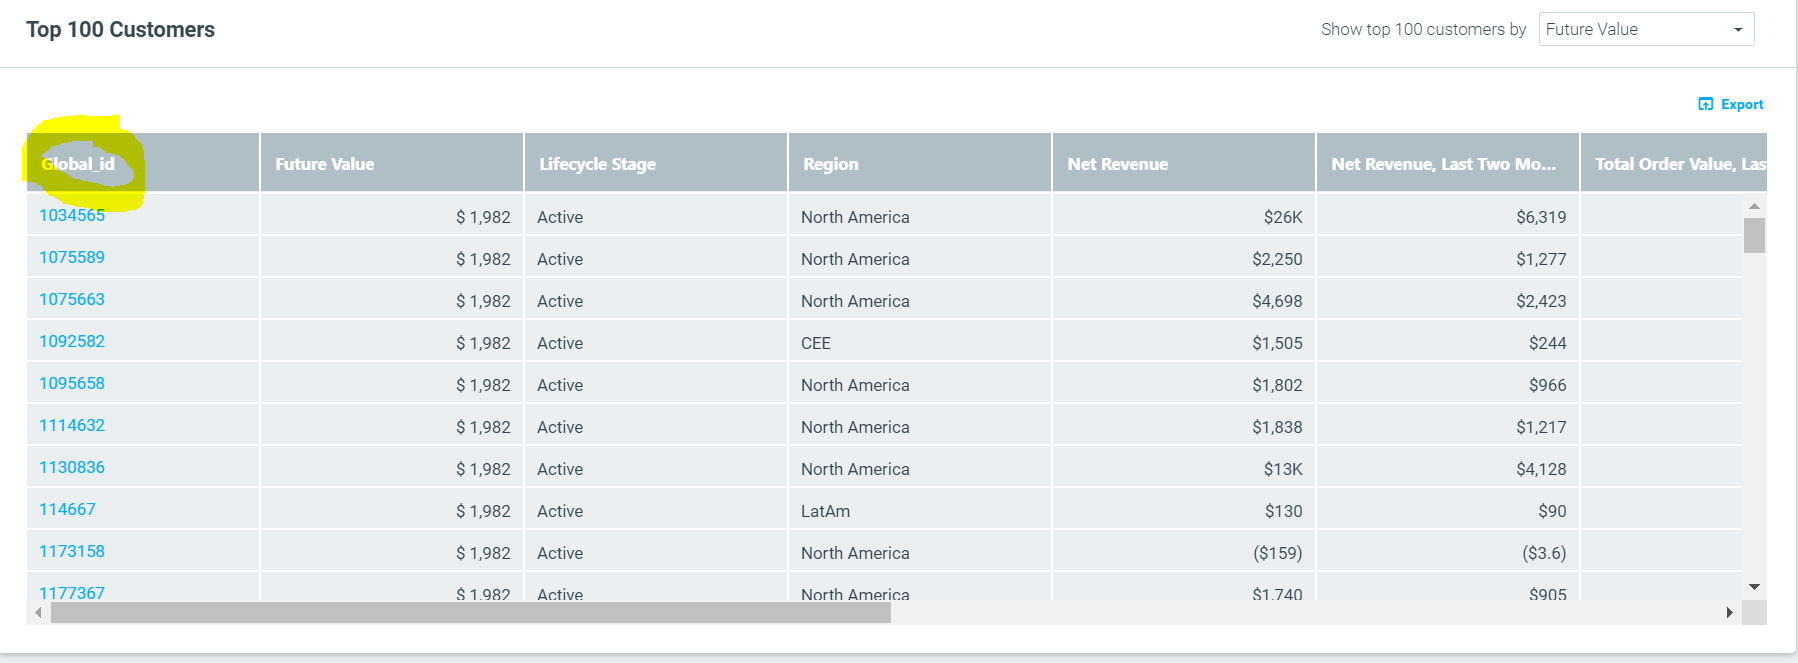
- Verify what the customer identifier used in your Optimove instance is. In case you are not sure, you could check it with your CSM or on the Optimove Customer Explorer page, as follows:
- Set up the Integration in Zendesk:
3.1 In Zendesk Support, click the "Admin" icon ( ) in the left sidebar.
3.2 Navigate to "Zendesk Admin Center" and expand the "Apps and Integrations" section.
3.3 Click "Webhooks".
3.4 Click "Actions" -> "Create Webhook".
3.5 Add necessary details: Name and Endpoint.
3.6 Enter the URL provided in step 1 and set the other fields as shown here:
 ) in the left sidebar.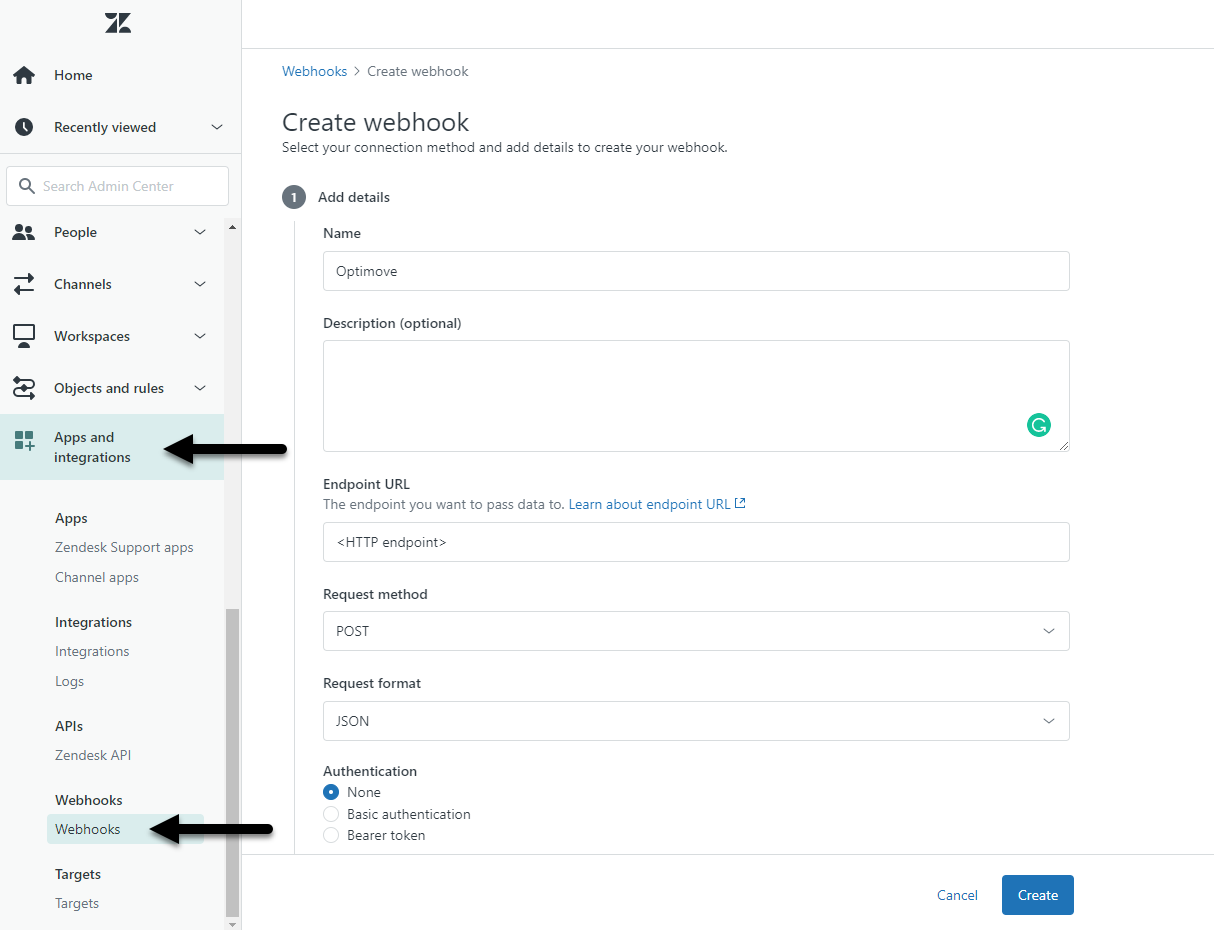
3.8 Test the integration by using one of the JSON codes below (3.13).
3.9 Once receiving a successful response (201) replace the ‘test target’ option with ‘create’ and click "Submit".
3.10 Navigate to the “Triggers” page.
3.11 Under Action, choose “Category” Notify by > Active webhook.
3.12 Choose the webhook provided by Optimove for Server-side-Endpoint (endpoint).
3.13 Create a server-side event using the JSON format below:
{
"tenant": 123,
"event": "ticket_update",
"context": {
"Tenant name": "{{ticket.ticket_field_360039812952}}",
"Ticket id": "{{ticket.id}}",
"Requester id": "{{ticket.requester.id}}",
"ticket_title": "{{ticket.title}}"
},
"timestamp": "2025-05-26T07:40:45.495Z"
}
Parameters:
- TenantID: Your Optimove Tenant ID.
- Event name: The name of the event.
- Context: The parameters you want to receive from the Zendesk ticket.
- Timestamp: When the event has happened.
Verify Proper Setup
To verify that the integration is working as expected, open a ticket with one of your internal users. You should see the resulting data in Optimove within a few minutes.