
Streams (also known as a journey) allow you to easily determine whether a specific series of campaigns is effective. Instead of analyzing a single campaign in isolation, Streams let you observe how a series of campaigns performs together compared to either an alternative treatment or a static control group.
By running a stream, you will be able to measure how each of your strategies is performing in terms of meeting your business objectives, as well as the contribution of each individual campaign. Streams help answer questions such as:
- Which customer journeys lead to the highest conversion rate?
- What is the best order for an onboarding sequence?
- How much impact do my campaigns have on my business?
- What is the best series of communications for a new target market?
- Are my efforts resulting in short-term revenue at the expense of lifetime value?
Step 1: Choose Your Build Method
There are two primary ways to build a stream:
- Visual Stream Builder: Use this when your stream’s campaigns must be ordered in a particular sequence or are somehow related (e.g., an onboarding sequence).
- Advanced Settings: Use this when there is no particular sequence or relationship between your stream’s campaigns.
Step 2: Navigate the Interface
Under "Execute", click on "Stream Builder". In the right-hand panel, you can find all the tools you need to build your stream:
- Building Blocks: All components needed to build campaigns (execution channels, flow control, and splits).
- Stream Settings: Name your stream, set up your stream objective, define the start date, and outline reoccurrences.
- Notes and Tags: Leave comments for team members and add tags for easy discovery in Mission Control.
- Activation Checklist: Check all settings and rules are valid in order to activate your stream.
Step 3: Core Logic and Objectives
Setting up your objective
There are two types of objectives:
a) KPI based: Choose this when your goal is to maximize a specific KPI (e.g., which Stream generates a higher order value?).
b) Migration based: Choose this when your goal is to optimize migrations from one lifecycle stage to another (e.g., Churn to Reactivated).
Start Date & Recurrence
Start Date: Set the start date for the stream. Analysis continues until the end date, after which the Stream is marked 'completed'.
Recurrence: Toggling this ON enables Control Group Optimization. This allows Optimove to automatically calculate the minimum control group size needed for statistical credibility.
Frequency Cap
When configuring a Stream with control groups and the "Include All" option, you can set a Frequency Cap to limit how often customers receive the test group treatment. Note that the Frequency Cap applies only to customers in the test group, not the control group.
Step 4: Building the Canvas
Define Target and Treatments
- Set the Stream’s Target Group by selecting "Select Reference Group/Criteria".
- The stream automatically splits into two treatments (e.g., 90% and 10%).
- To experiment with different strategies, you can add up to four treatments by clicking on the treatments component in Canvas.
Add Campaigns and Configure Exclusions
- Start building the campaign flow by dragging a channel from the right-hand bar and connecting it to the relevant stream.
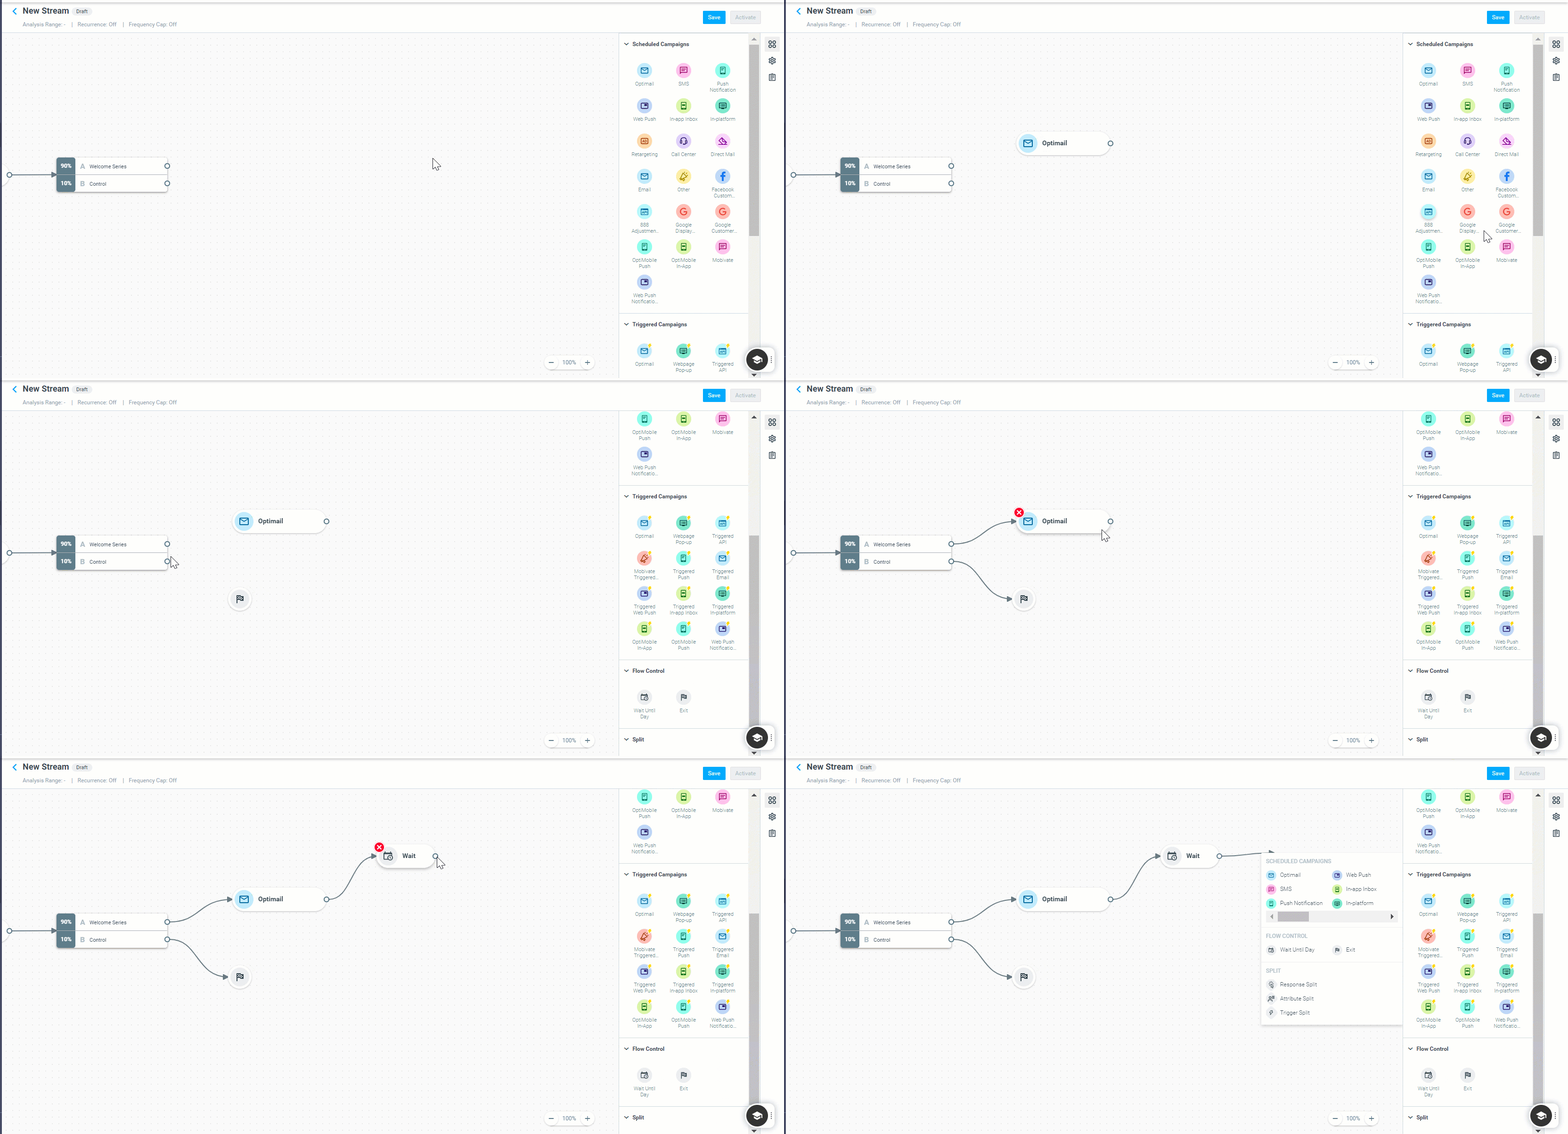
- Double-click the channel to edit. Choose your template and duration.
- Exclude by Channel: The exclusion section in Streams now matches Campaign Builder. When By Channel is selected, you can configure exclusions using the same channel list, behavior, and UI as Campaign Builder.
Flow Control and Splits
- Wait Until Day: Ensure there is a "Wait Until Day" rule between campaigns so the next one takes place on the defined date. If you want customers to receive the next campaign within 3 days (even if the previous campaign took 3 days), ensure Include All is selected.
- Trigger Split: To add a triggered campaign, choose the Trigger Split, set up trigger details, and select a channel.
- Decision Points: Add an “Attribute Split” or “Response Split” to branch the journey based on customer data or engagement.
- Exit Criteria: Define a Target Group for the automatic removal of customers from the entire Stream flow.
Step 5: Activation and Management
- Click “Save” when making changes – the canvas is not saved automatically.
- Click “Activate.” Once created, Optimove will automatically create a folder under the Target Groups page using the Stream name.
Advanced Stream Management
How to Edit Active Streams
Navigate to Plan → Streams and choose “Edit” from the three dots menu.
- Scheduled Streams: Edit template, promotion, duration, exclusion, and recurrence.
- Running Streams: You can only edit the template, promotion, and end date for the recurrence.
Hybrid Stream Constraints
Combining batch and real-time campaigns may lead to invalid rules. Common causes include:
- Triggered campaigns must be connected to a "Trigger Split (Yes)".
- Triggered campaigns can't be followed by another campaign on the same day.
- "Response Split" and "Wait Until Day (today)" cannot be followed by a triggered campaign.