
In the Email Visual Editor, a content row provides the structure for a horizontal band of content within an email template. Each row contains one or more columns that can hold “content blocks” of different types of content (e.g., text, images, videos). Email templates consist of multiple rows.
The Visual Editor contains pre-built rows, based on email best practices, and also allows you to create, save, and re-use custom rows.
Using Pre-Built Content Rows, Step by Step
> Video Transcript
Using pre-built rows is fast and easy, and is a good way to get started building email templates.
Follow these steps to use a pre-built row in an email template:
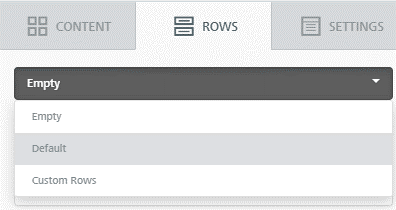
1. In the right-hand pane of the Visual Editor, click the Rows tab and select Default from the drop-down list:
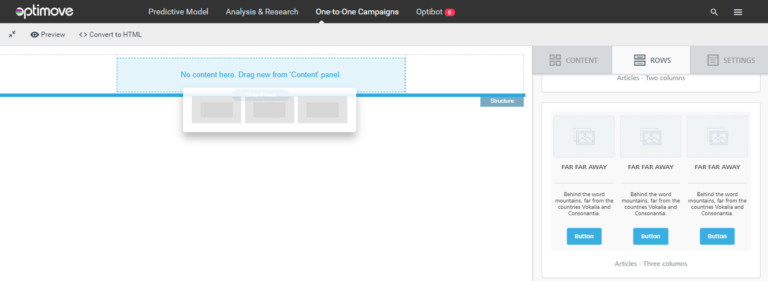
2. From the available rows shown, drag one onto the template’s canvas:
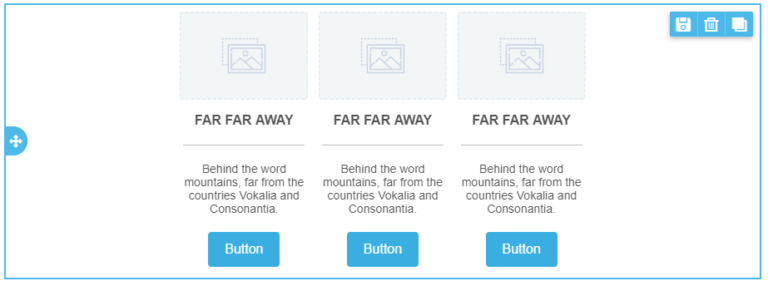
3. Modify the row’s settings and content blocks as desired, by clicking each item you want to change. You can change the text, add images, alter the CTA button text, etc.:
4. After customizing the row, you can also save it for future use as a Saved Custom Row (see next section).
Creating, Saving, and Reusing Custom Rows, Step by Step
When working with the Email Visual Editor, you can save rows you’ve created for reuse in other email templates. This feature allows you to save a lot of time, while also helping to design email templates with a consistent appearance.
Common use cases for using saved custom rows are:
- Header row
- Footer row
- Social media accounts row
To save a pre-built row that you’ve customized (as described above), you can skip stepping 5, below. The following step-by-step instructions describe how to create a new row from scratch and then save it for later re-use.
1. Decide on the structural layout you want to use: How many rows of content will your template contain? How many columns will each row contain? Which content types will each row include?
2. In the right-hand pane of the Visual Editor, click the Rows tab and select Empty from the drop-down list to see the available row styles – for this example, drag a two-column style onto the template’s canvas:
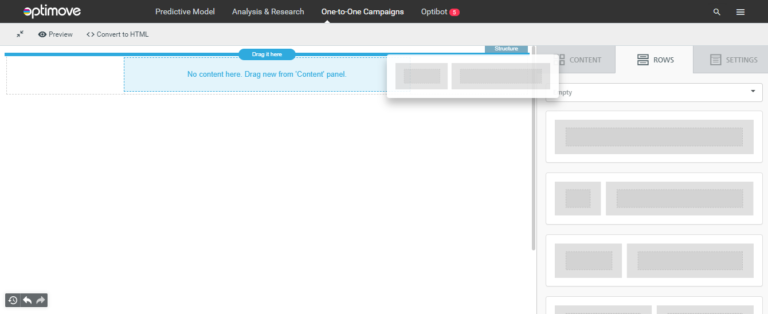
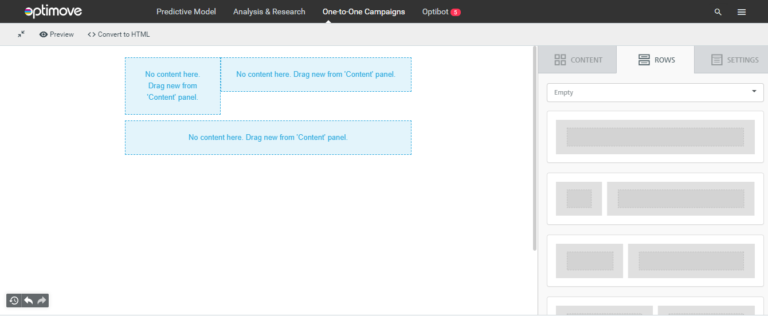
|| Note: when you click on a row, you can see its properties on the right side of the editor. Customize these properties as desired.
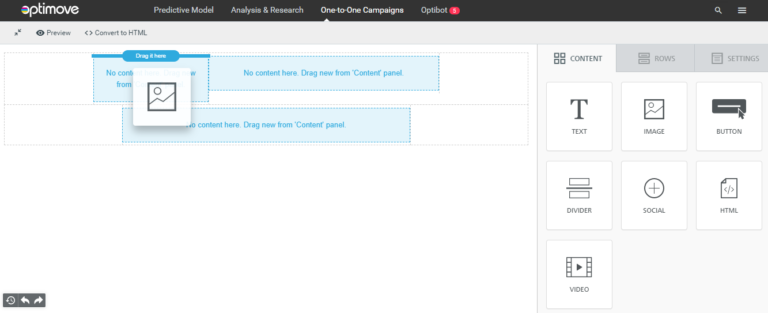
3. Click the Content tab to see the available content blocks – drag and drop an image block into the left column of your new row:
4. Next, drag a text content block to the second column of the row, next to the image:
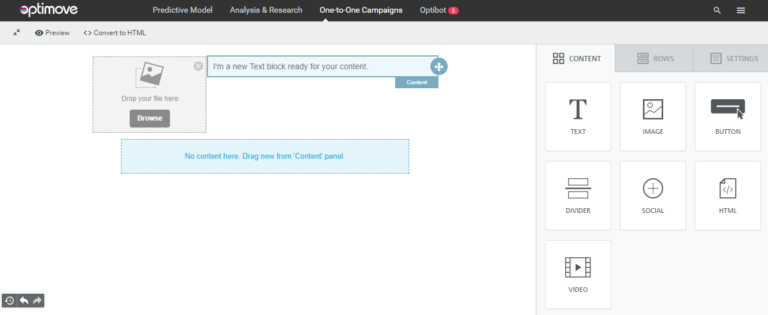
Now that you’ve created a custom row, you can save it for future use across other templates:
5. In the template canvas, click on the row you want to save. A selection bar appears at the row’s top-right corner. Click Save (the first button from the left):

6. Enter a name for the row.
To use the row across brands and templates, choose the relevant list to save the row to.
- All brands & template types – this list will be accessible on all of your brands and templates.
- Save for “brand name” – will save the row in a list available only on the specific brand.
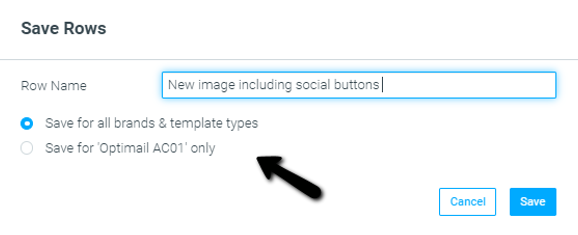
|| Note: the “Save for all brand & template types” option is only available for newly saved rows. To use an existing custom row, you should re-save it and follow steps 5 & 6 above.
7. To add a saved custom row to a template, click the Rows tab in the right-hand pane of the Visual Editor and select Custom Rows from the drop-down list:
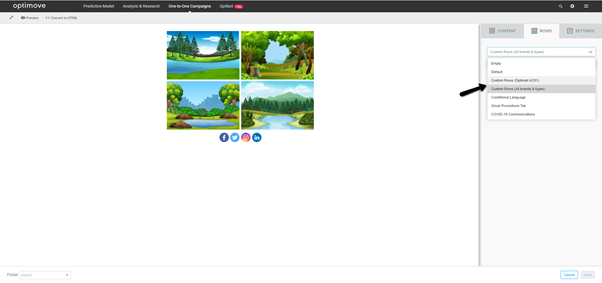
8. Drag the saved row from the list onto your template’s canvas.
|| Notes:
- Saved custom rows appear in the order in which they were saved, with the most recently saved row on top.
- If you have many saved rows, use the search box to find the row you are looking for (only the last 30 saved custom rows are initially shown; use the search box to see others).
- Custom rows cannot be deleted or renamed. However, you can overwrite a saved custom row by saving a new row with the name of the row you want to replace.