
Please note:
This feature is only available for Email clients and can only be used for scheduled campaigns. If you would like to learn more about Email and its advanced features and capabilities, please reach out to your CSM.
As an Email client, you have the ability to upload a CSV file of your contacts collected from external sources and target them with personalized Email campaigns to convert them into lifelong customers.
The guide below will walk you through how to prepare your data for upload, how to import your contacts into Optimove, and how to target them with Email campaigns.
Step 1: Prepare Your Data
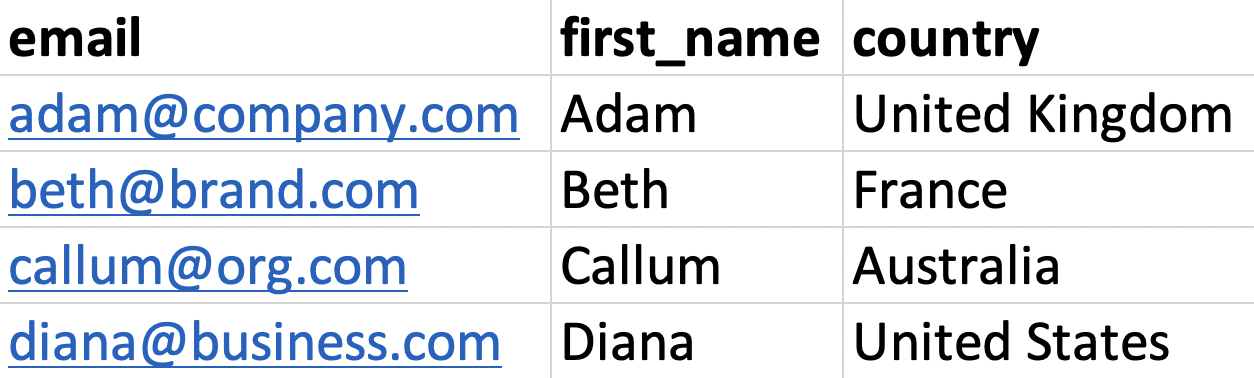
When you have gathered the data on the individuals you would like to target via an Email campaign, you will need to ensure that the data is correctly prepared for the mapping and upload process to run smoothly.
- You will need to have your data in a CSV file format
- The first column of your CSV file must be an email address column
Step 2: Upload and Map Your Customer Attributes
- Navigate to the Settings area of your Optimove site, scroll to Data Studio, and click Imported Customers
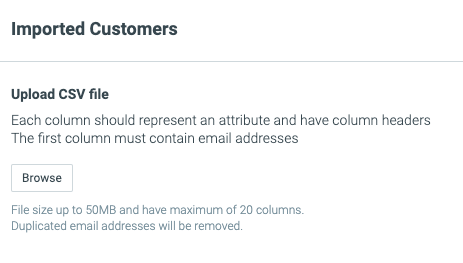
- From here, clicking Browse will allow you to select the CSV file of the customers you would like to upload to Optimove
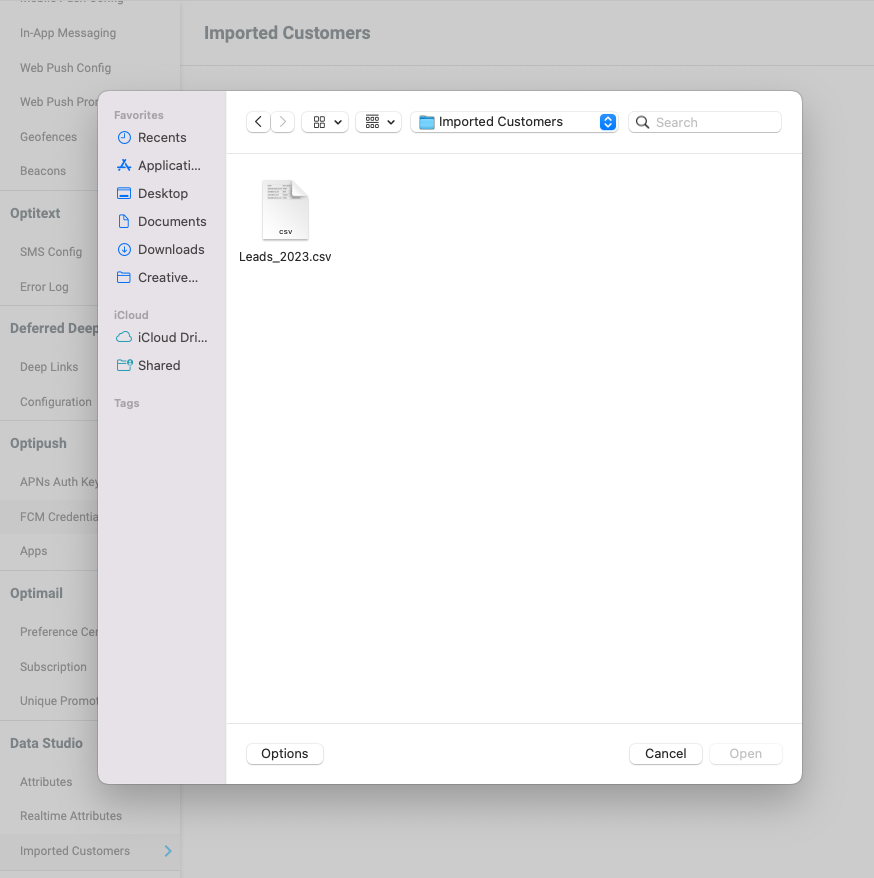
- When you have selected your CSV file, you will now have to map each of the columns to existing Customer Attributes in order to use the data behind the attributes as personalization in your Email templates
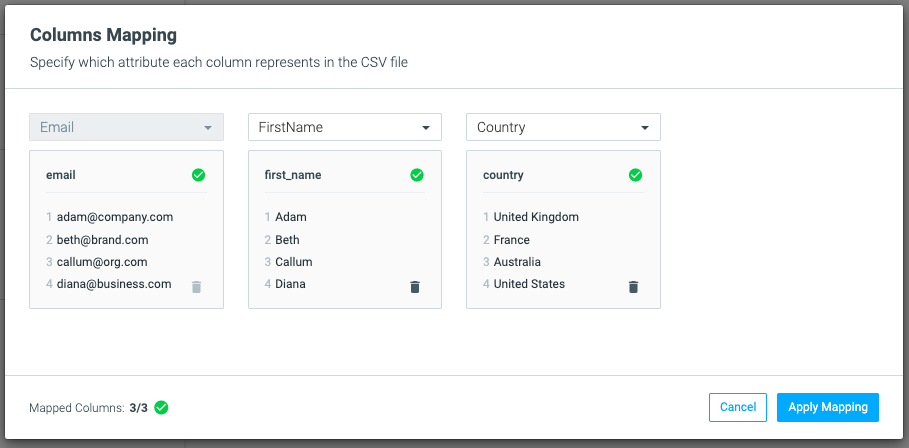
- When happy with your mapping, click Apply Mapping to upload the list of customers
Important Notes:
- Once the Imported Customers file has been uploaded, these attributes cannot be updated, and all other attributes that were not uploaded in the file will be Null.
- Two new attributes will be created and attached to those Customers: the Imported Customer Upload Date and the Imported Customer File Name.
Please note:
When you upload the file, Optimove will check your data for errors and will filter out any customers who already exist in your database. There are several possible reasons why a customer may not be uploaded:
- Their email address already exists in your database, either as an existing customer or as a previously imported customer
- Their email address has been duplicated in the file that is being uploaded
- Their email address is not valid
Step 3: Save and Create Your Target Group
- Once uploaded, your customers will be added to a new lifecycle stage called Imported Customers
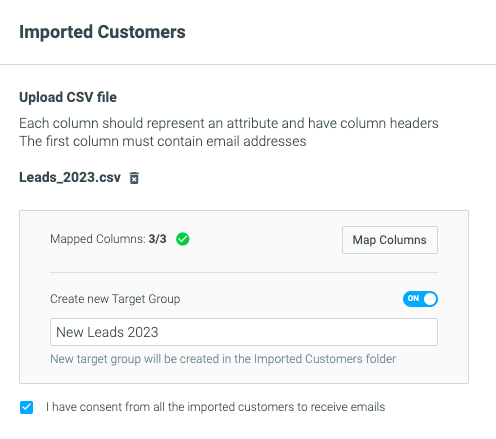
- To save your Imported Customers as a new Target Group, simply slide the toggle to ON before clicking Save on your Imported list. This will create your new Target Group, which can then be found in the Imported Customers folder in the Target Groups area of the site.
- When your Target Group has been created, you’ll be able to use the customers in that Target Group as part of other segmented Groups, all contained within the Imports folder.
Important Notes:
- In the Imports folder, there will be a default condition in these Imports Target Groups of Lifecycle Stage = Imported Customers
- The newly created list of Imported Customers can be used as a standalone Target Group, added to a new, segmented Target Group of Imported Customers using any uploaded attributes, or included in new Target Groups that combine Imported Customers with Regular Customers as well. For the latter, we recommend keeping these types of Target Groups separate in a dedicated folder.
- You are able to segment Target Groups of imported customers by Engagement Activity, Campaign History, or any attributes that have been uploaded, as well as the LCS.
Please note:
Before you click Save, ensure you have ticked the box to confirm that you have received consent from the customers on the list to market to them via email. If you have any questions about getting consent from your customers, learn more here.
Step 4: Create Your Email Template
Follow the normal steps for creating and previewing your Email template, which you can find here.
You will be able to personalize your Email template using the customer attributes that were included in the imported file of contacts.
Step 5: Create Campaign Using Template and Imported Target Group
When you are happy with your Email template and have previewed it to make sure your personalization tags are working as expected, you can then create your Email campaign.
You can create Scheduled Email campaigns to engage your Imported Customers and turn them into Active Customers.
Step 6: Analyze Your Campaign
Campaigns will be visible in your Mission Control, where you will be able to access Campaign Metrics, Channel Metrics, and Campaign Analysis.
Please note:
Because your customers don’t yet exist in the database, we will not be able to show any KPI metrics as a result of your campaigns.
Step 7: Optimize and Retarget
Remember, you can retarget your Imported Customers multiple times once they have been uploaded to your Optimove site.
Once you have analyzed and reviewed your campaign in Mission Control, you can optimize your campaigns and send out a new Email campaign to your imported Target Group.
Please note:
- Once an Imported Customer has been uploaded, they will remain in the Lifecycle Stage ‘Imported Customers’ for 180 days
- Imported Customers who have not converted within 180 days will be removed from the Lifecycle Stage. They can, however, be re-uploaded after this time.
- An Imported Customer will be considered converted if the same email address that was uploaded in the email field of the CSV file then appears as part of the batch data update. We will then migrate the data of the converted Imported Customer to the database customer.
Important Notes:
There are a few key things to remember when targeting Imported Customers:
- Imported customers that have not converted will be deleted after 180 days. Once deleted, the customer list can be re-uploaded and targeted again.
- When the Imported Customers are deleted, the data associated with campaigns sent to these customers will be saved.
- The Imported Customer can be uploaded only once, but retargeted during the 180-day time period.
- The number of contacts in the Imported Customers lifecycle stage should not exceed 1,000,000
- The Target Group created during the Import process will only live in the Imported Customers folder, and cannot be dragged or moved in or out of this folder
- Imported Customers can be targeted immediately once the CSV file has finished uploading, which can take up to a few minutes.
Use Cases
Provided Email Address but Not Converted
If you have collected potential customers’ email addresses early on in their journey, for example, via a pop-up when they first visit the site, but they did not go on to create an account or make a purchase, you may have a list of customers that are not in your database but are able to receive Email marketing campaigns.
In this use case, uploading a file of these customers to Optimove will allow you to encourage them to complete the purchase or deposit, and in doing so, convert them into Active customers.
Provided Email Address at Offline Event
If your organization collects email addresses at OOH marketing events, at trade shows, or at another offline event, these won’t be included in your customer database.
Therefore, using Email campaigns to target and convert these contacts into Customers is your ideal next step.
Receiving List from Third Party or Collaboration
Similarly, if you have held an event in collaboration with another organization or have worked with a third party and received a list of marketable contacts, using the Import Customers feature in order to target them with Email campaigns will allow you to improve the conversion of leads from external sources and turn them into Active customers.