Mission Control Overview
Watch this video to get an overview of Mission Control.
Mission Control plays a key role in scaling your marketing strategy by providing a centralized platform for analyzing, monitoring, and strategizing your campaigns.
Mission Control provides a clear view of your campaigns, both real-time and scheduled, allowing you to customize your set-up, filter and sort your information, and gain key insights regarding your marketing efforts.
This bird’s-eye view, as well as the ability to drill down into your previous, present, and upcoming campaigns, allows you to operate seamlessly to:
- Analyze – campaign managers, team leads, and executives can each view marketing performance at the level they need to. For example, customizing the Mission Control to compare campaigns both individually and as a series.
- Monitor – easily monitor campaigns to identify if there is something that needs to be adjusted. For example, easily find campaigns with no customers, priority and exclusion issues, or recurrences that are about to end.
- Strategize – leverage Mission Control’s flexibility to view the information you need and strategize the next steps. View upcoming campaigns, best performers per KPI, sort per engagement activity, and much more.
Mission Control also unifies the presentation of triggered and scheduled campaigns, providing a single, centralized view for all your campaigns.
Mission Control Basics
- Each campaign series is represented as a single row
- Each campaign occurrence can be seen when clicking the chevron next to the campaign menu to drill down into your campaign analysis
- Each column represents a campaign metric. You can add and remove columns using the Column pane
- Campaign results are presented as an aggregate for the time period being analyzed, and results from individual occurrences can be accessed via each row's dropdown
Mission Control Dashboard
The Mission Control dashboard outlines key aggregated campaign metrics based on your chosen timeframe and KPI.
The first thing to set is the date range. You can set your date to view your campaigns clearly within a given time frame.
The default time frame is this week. You can click the arrows on the left to jump to the next/previous week or click on the calendar icon to choose a defined time frame, such as “This week,” This month,” “Last Month,” or set a custom time frame.
The next setting regards the KPI.
The KPI dropdown menu enables you to select from your set of key performance indicators, providing a clearer view of your campaign’s performance.
"Increase" calculation in Mission Control
- As a reminder, a row represents each campaign, and the row's Increase is calculated as a Series Analysis (the combined results of all the individual occurrences during the analyzed period).
A lightning rod will be displayed next to the target group column of Triggered campaigns; a lightning rod will not be displayed for Scheduled campaigns.
Setting Up Your View
- Select your chosen campaign KPI to measure the campaign’s performance
- Add columns and filters to suit your needs. Read here to understand how you can best customize your view.
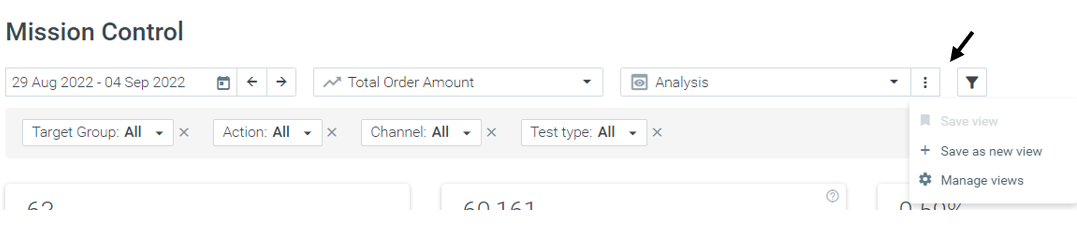
- Save your view for quick access.
Analyzing your Campaigns
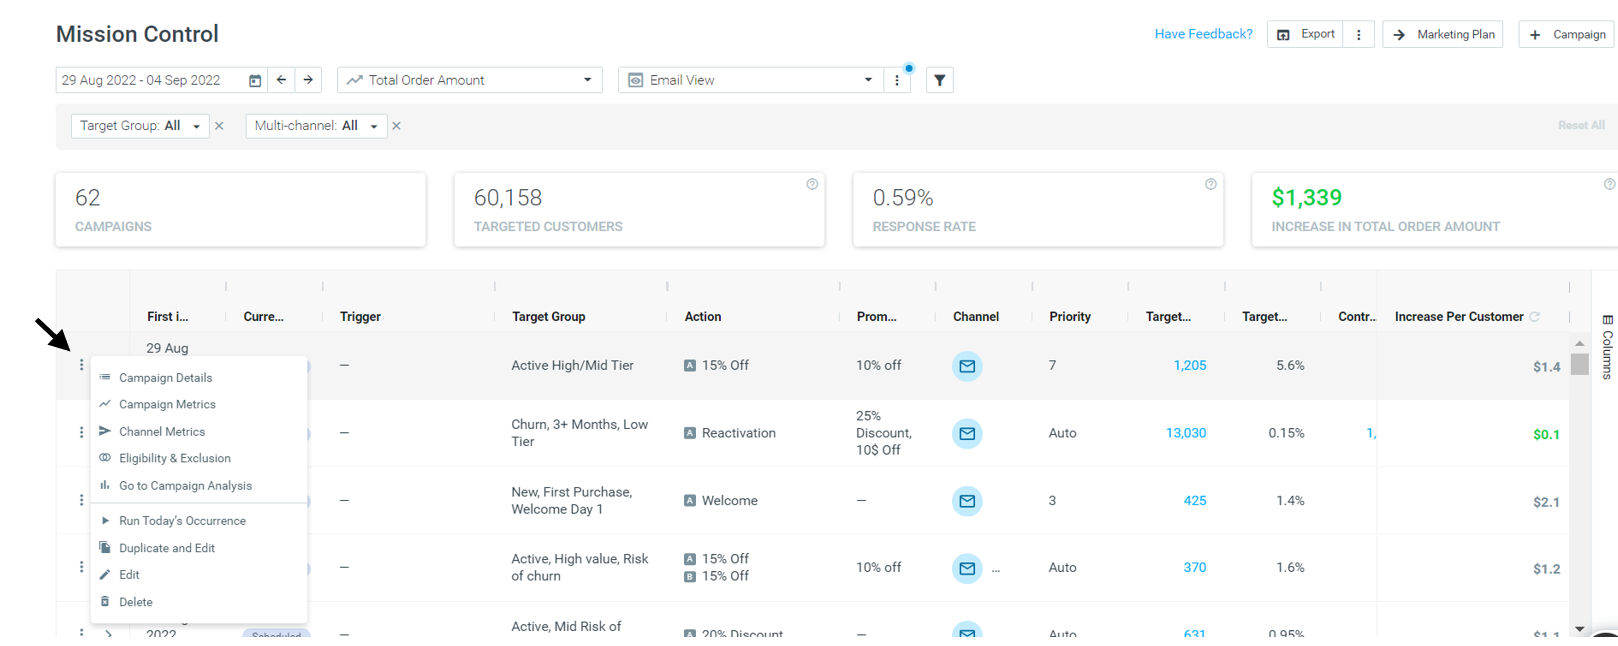
You can also view all the campaign details you need in just a couple of clicks. Click on the three dots next to each campaign and select:
- Campaign Details: This outlines all the components that go into your campaign, including the Target Group, scheduling details, and execution details.
- Campaign Metrics: here you find a graph to visualize the KPI uplift of your campaign and the response breakdown.
- Channel Metrics: campaign metrics related to all templates for specific campaigns, such as opened and clicked rates for an Email campaign
- Eligibility & Exclusion: Here, you can see how many customers were excluded from the campaign, why, and by which campaign, according to your campaign priority rules.