
Creating multi-template campaigns in Optimove can allow you to target your customers with different campaign templates without needing to create multiple campaigns for each template. As a result, not only is the campaign setup simpler but also reporting on all templates is unified. When using this capability, templates are sent based on customers’ value for a specific attribute. For example, use multi-template campaigns to send localized versions of an email newsletter based on customers’ preferred language.
How to set up a multi-template campaign
The following video includes an overview of how to set up a multi-template campaign in Optimove. For a step-by-step guide scroll below the video.
1. Go to the Campaign Builder and complete the “target group” and “Scheduling” sections.
2. In the “Execution Details” section select the relevant Action. For example, “Newsletter.”
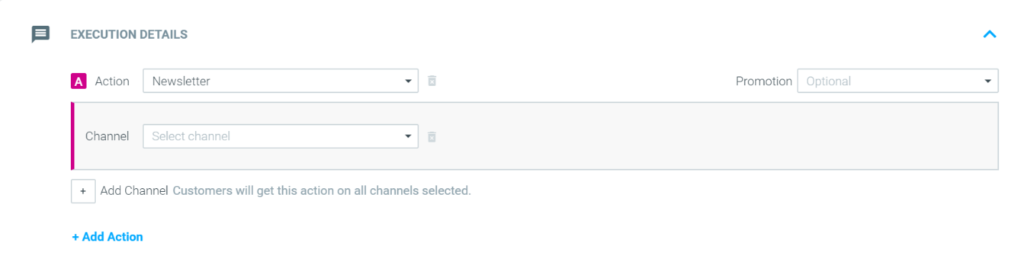
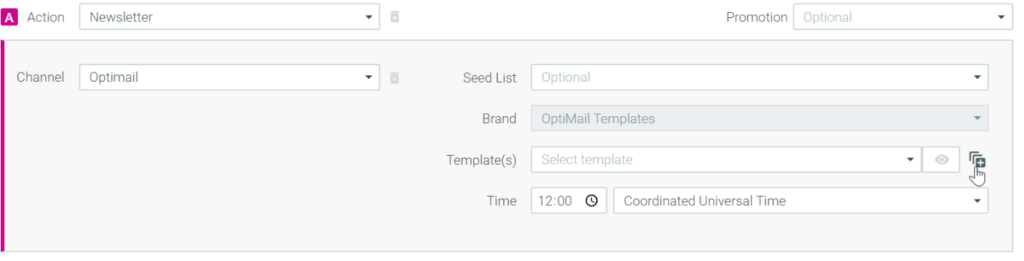
3. Choose your channel and click on the multiple templates icon to the right of the template dropdown box.
4. Fill out the different conditions and relevant templates for each one. Note that each condition can also be scheduled to a different time. Finally, a default template is chosen for all the customers who do not meet the defined conditions. For example, based on Language you can separate French, Spanish and English speaking customers to receive different versions of the newsletter at 12:00pm local time.
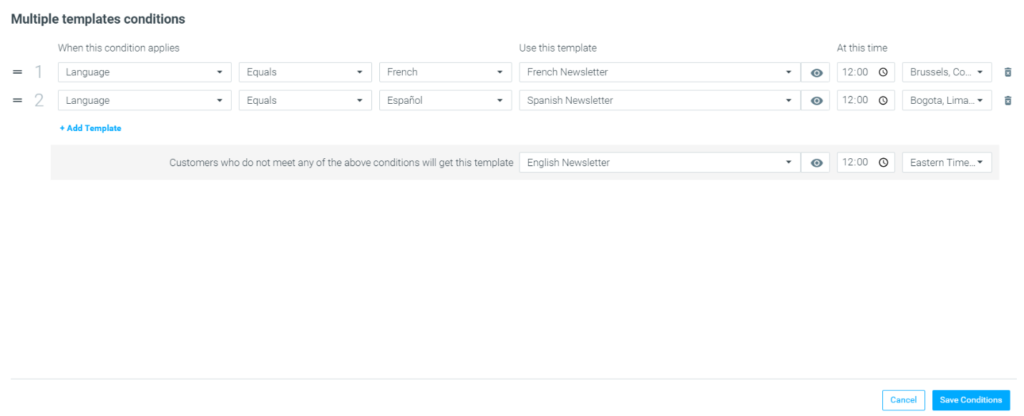
|| Note: If a customer is eligible to receive more than one template, the templates will be prioritized from the top down. For example, if a customer is eligible for templates 2 and 3, they will receive template 2.
5. Finalize your campaign setup by setting a control group and clicking “Create Campaign.”
Example Use Case
Throttling messages for improved deliverability
When sending campaigns to very large customer data sets it might be best to throttle the campaign execution in order to improve deliverability metrics.
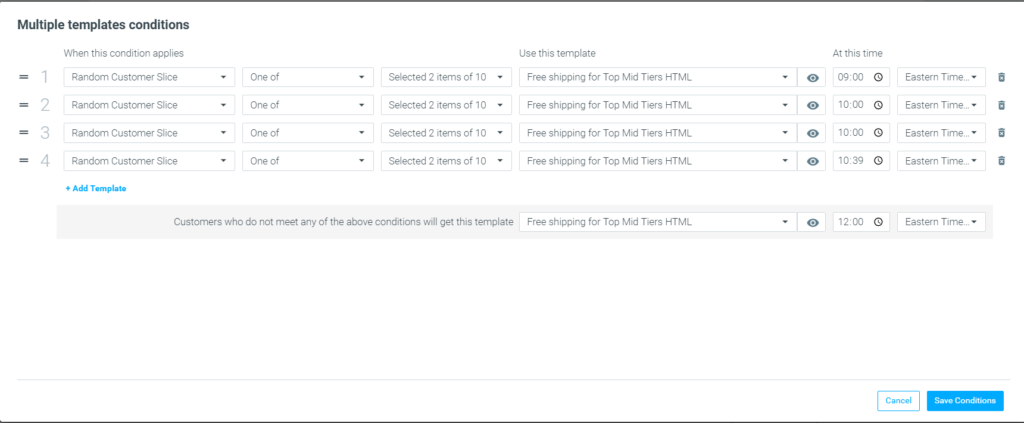
For example, using a multi-template campaign setup you can easily throttle email sends by leveraging Optimove’s Random Customer Slice attribute.
To do so follow the below steps:
- Go to the Campaign Builder and complete the “target group” and “Scheduling” sections.
- In the “Execution Details” section select the relevant Action. For example, “Free Shipping – 48 hours.”
- Select Optimail (or your email provider) and click on the multiple templates icon to the right of the template dropdown box.
- Select Random Customer Slice as the customer attribute. And choose one or more slices based on your throttling needs.
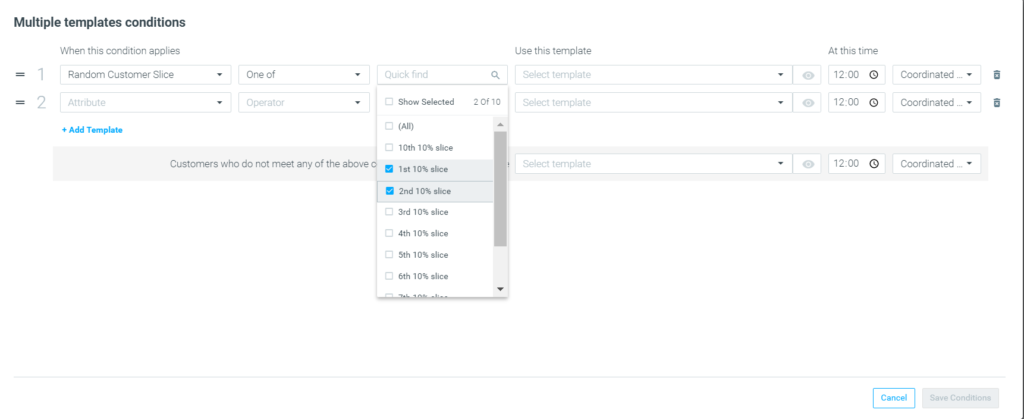
5. For each set of Random Customer Slices, select the template and set a different send time.
6. Finalize your campaign setup by setting a control group and clicking “Create Campaign.”
To learn more, check out Campaign Building 101 in Optimove Courses.